Configure SSO with Okta
Use our dedicated integration with Okta as your Identity Provider
Introduction
Single Sign-On is a login system that uses your company identity to authenticate at third-party services. If you use SSO, you don't need to manage multiple sets of usernames and passwords for all your services, and team administrators can manage their team members in one place.
This article details how to configure Okta as the primary Identity Provider to facilitate SSO with your WonderProxy account.
Supported features
-
SP-initiated SSO (Single Sign-On) — in this scenario, the user begins their journey on WonderProxy site, and is subsequently redirected to Okta for authentication.
-
IdP-initiated Flow — in this scenario, the sign in is initiated from the Okta End-User Dashboard.
-
Just-In-Time provisioning — you can enable a feature in your Single Sign On settings on WonderProxy to automatically create new proxy users whenever someone signs in using Okta.
Configuration requirements
- You are signed in using an administrator account to WonderProxy
- Your WonderProxy plan enables Single Sign-On
- You have administrative access to your Okta tenant account
Create the integration in Okta Panel
-
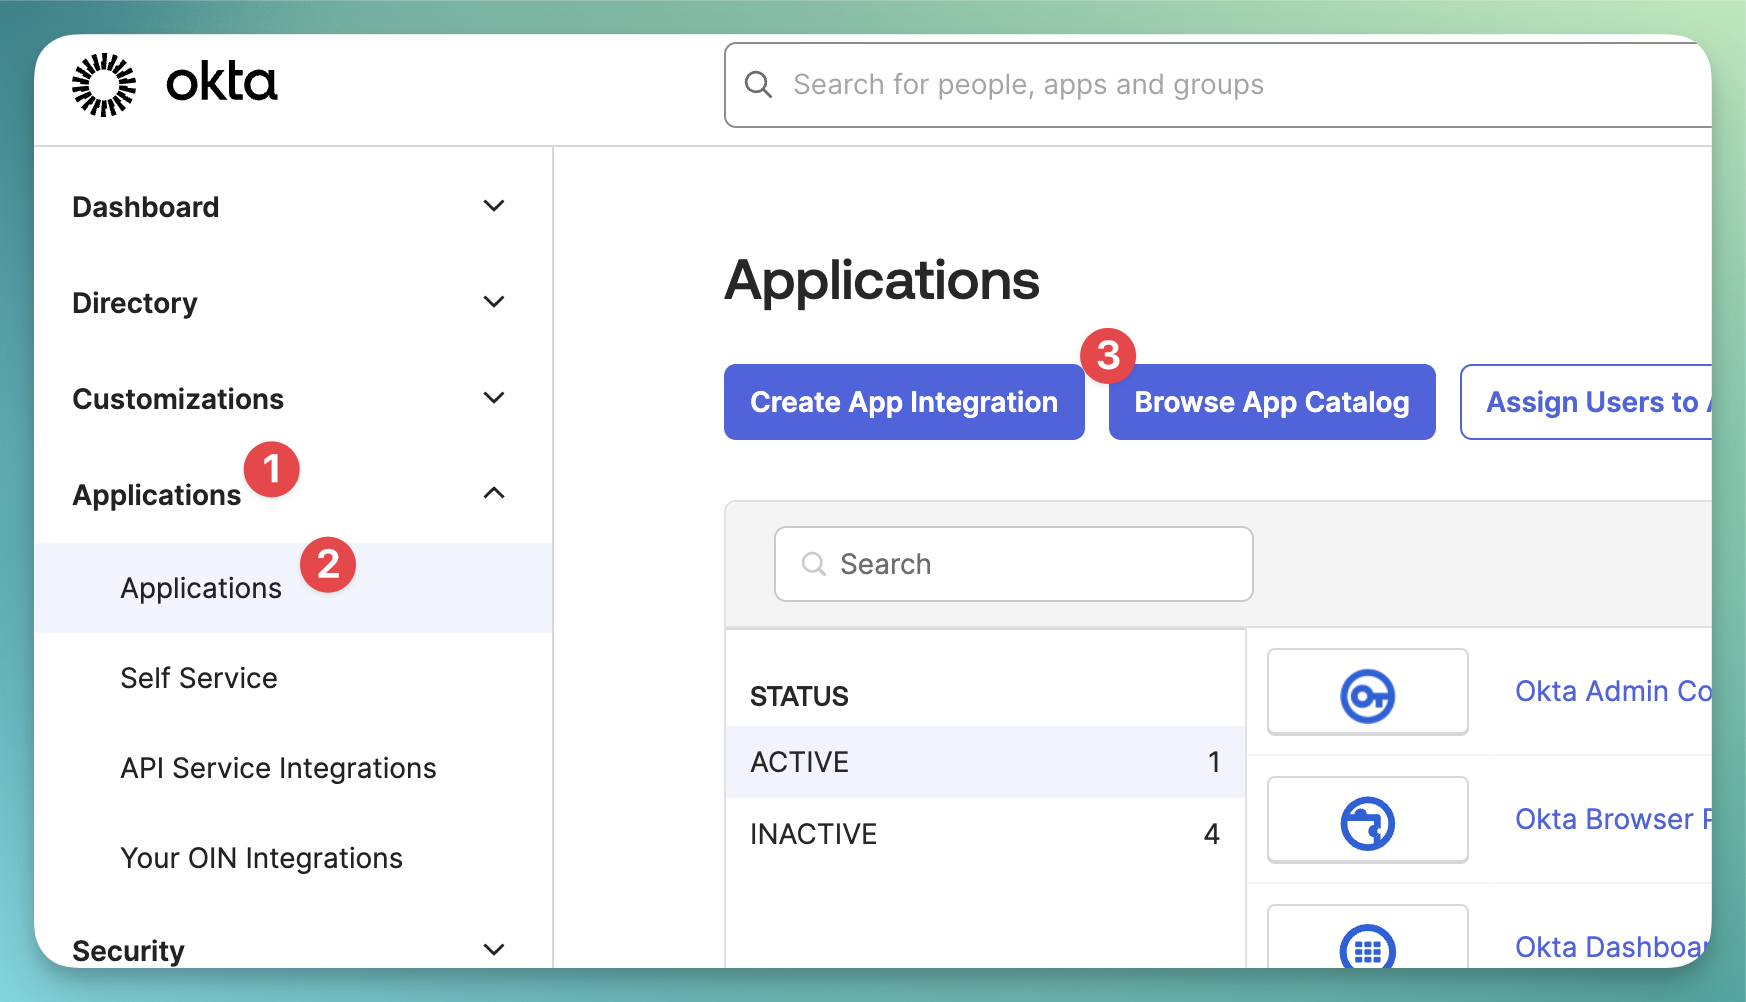
In the Okta dashboard, navigate to Applications, then select the Applications sub-menu,
and click the Browse App Catalog button.
-
Search for
WonderProxy
and add this application.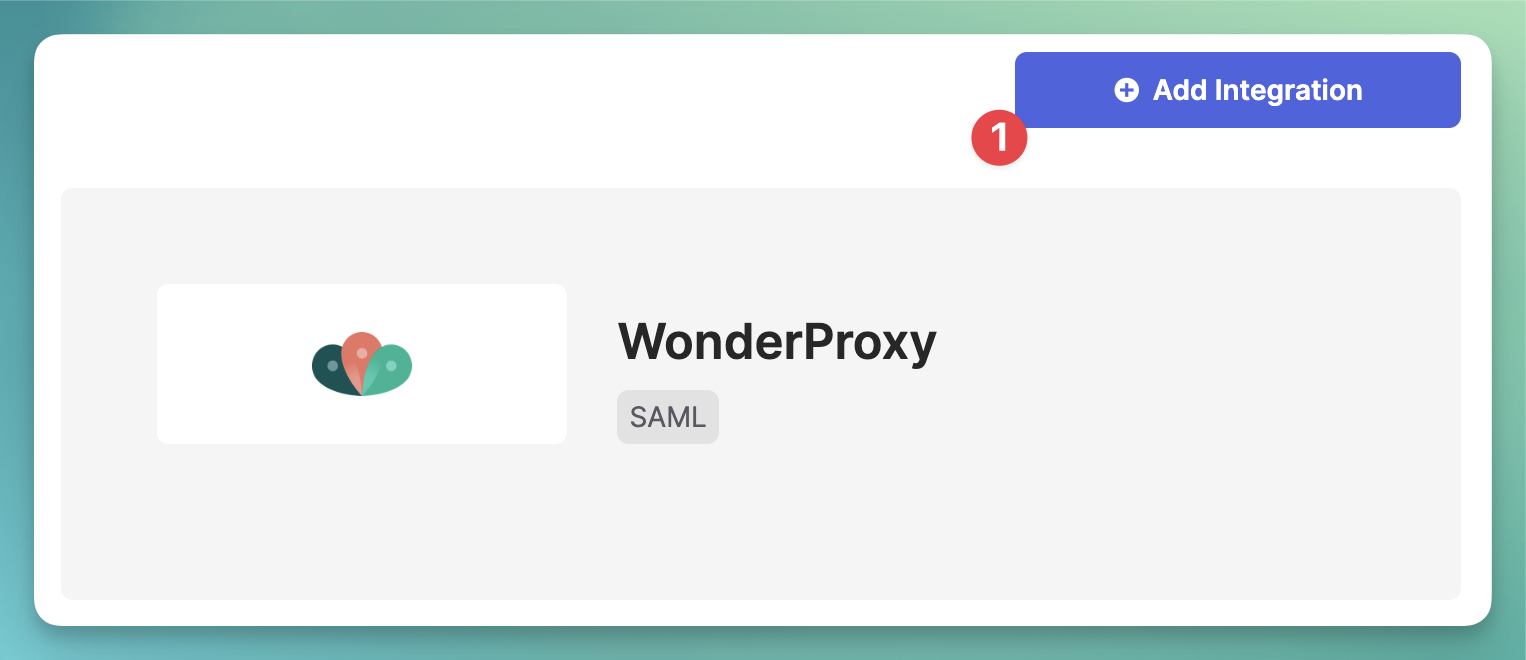
-
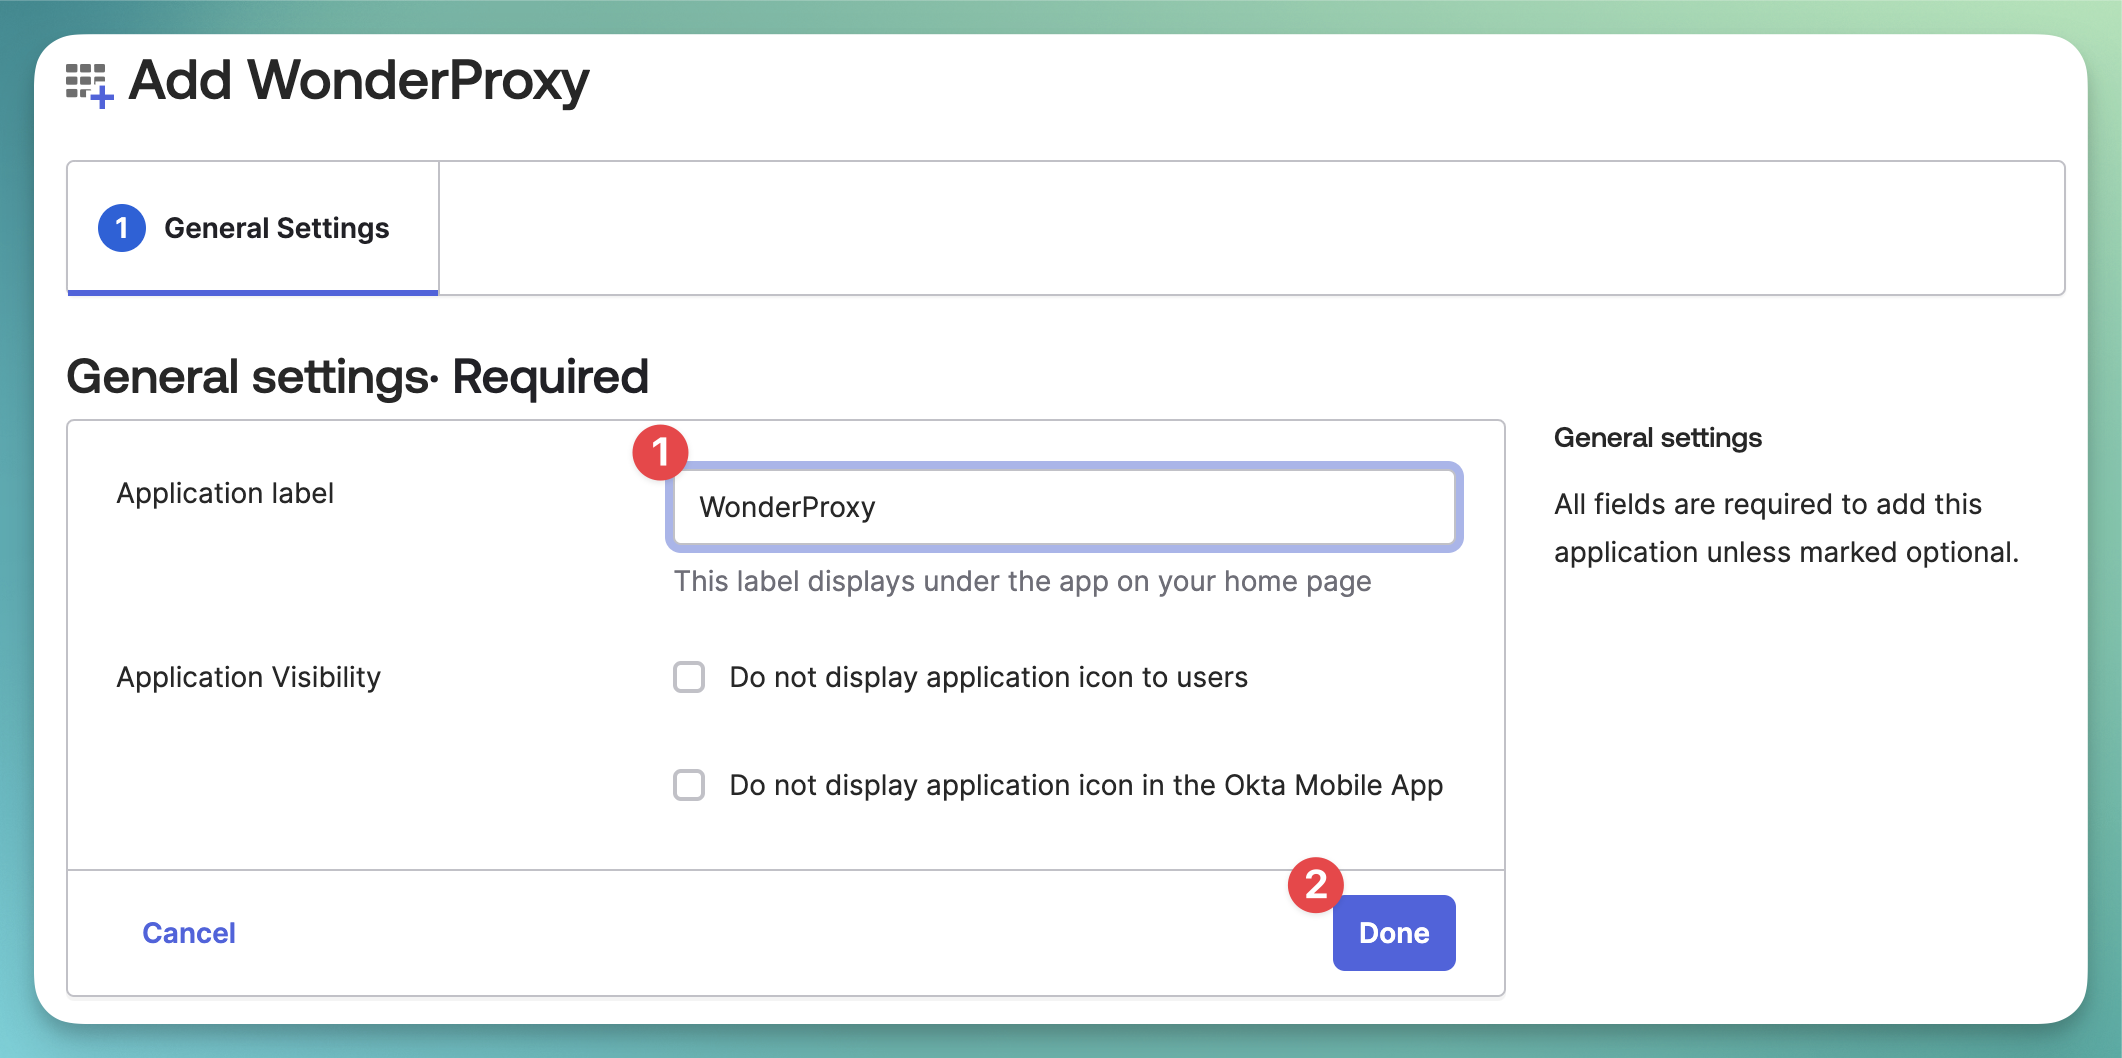
Use a descriptive name for your application and click
Done
-
In the
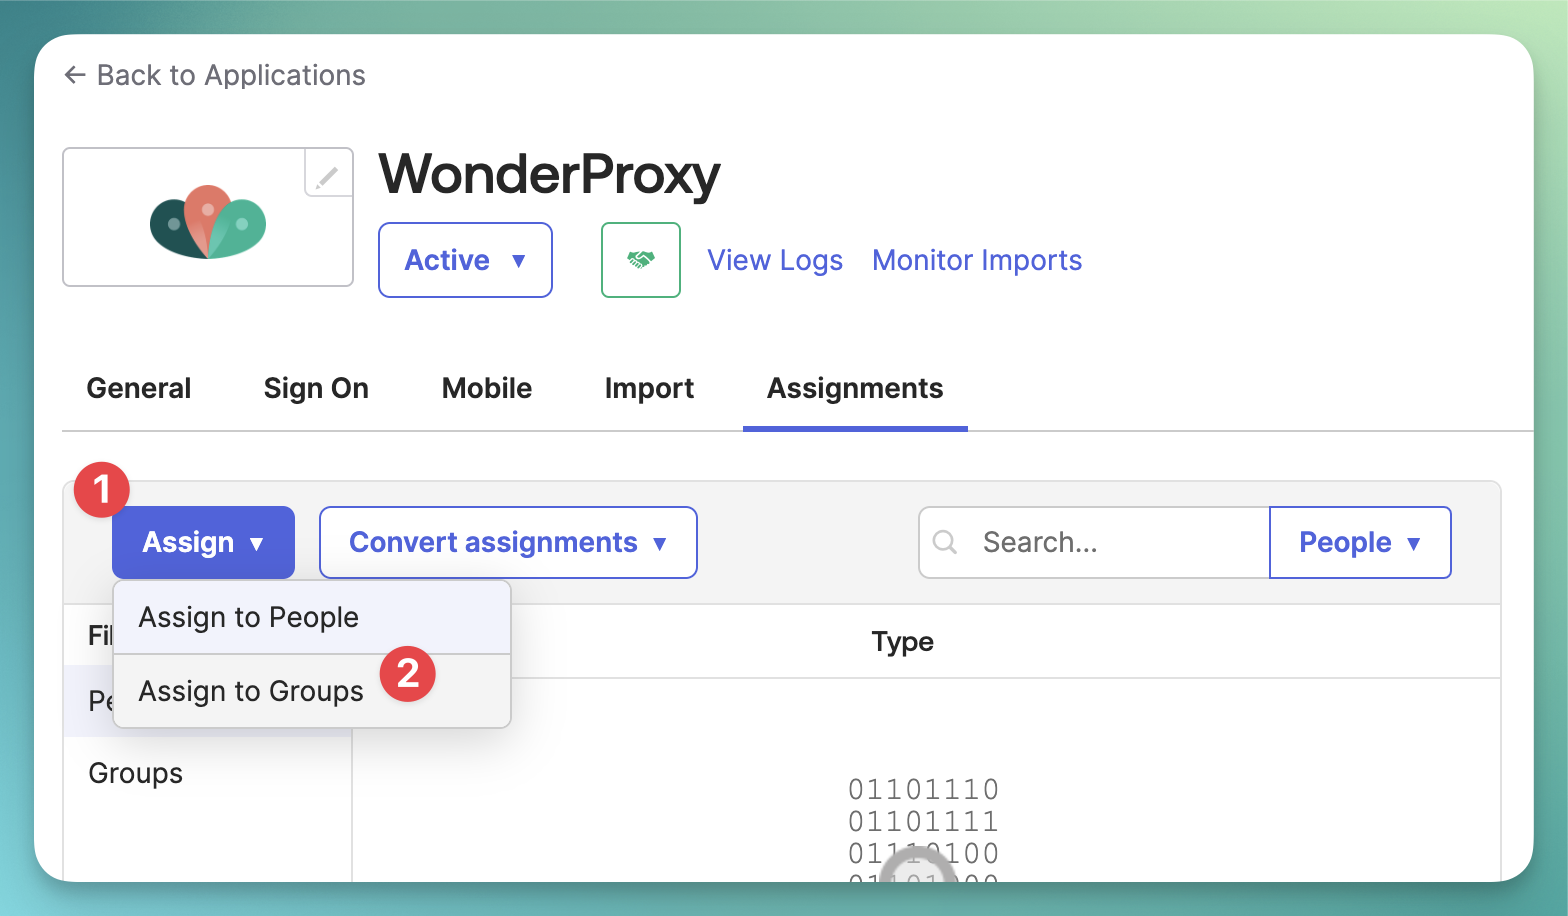
Assignments
tab, selectAssign
and then chooseAssign to Groups
. In the popup chooseEveryone
and confirm by clickingDone
.
Enable Single Sign-on for your WonderProxy account
-
Still in the Okta Panel, navigate to the
Sign-on
tab and scroll down to theSAML Signing Certificates
. Select the actions dropdown and right-click theView IdP metadata
and choose to save the target as a file with.xml
extension. This will be imported to WonderProxy in the next step.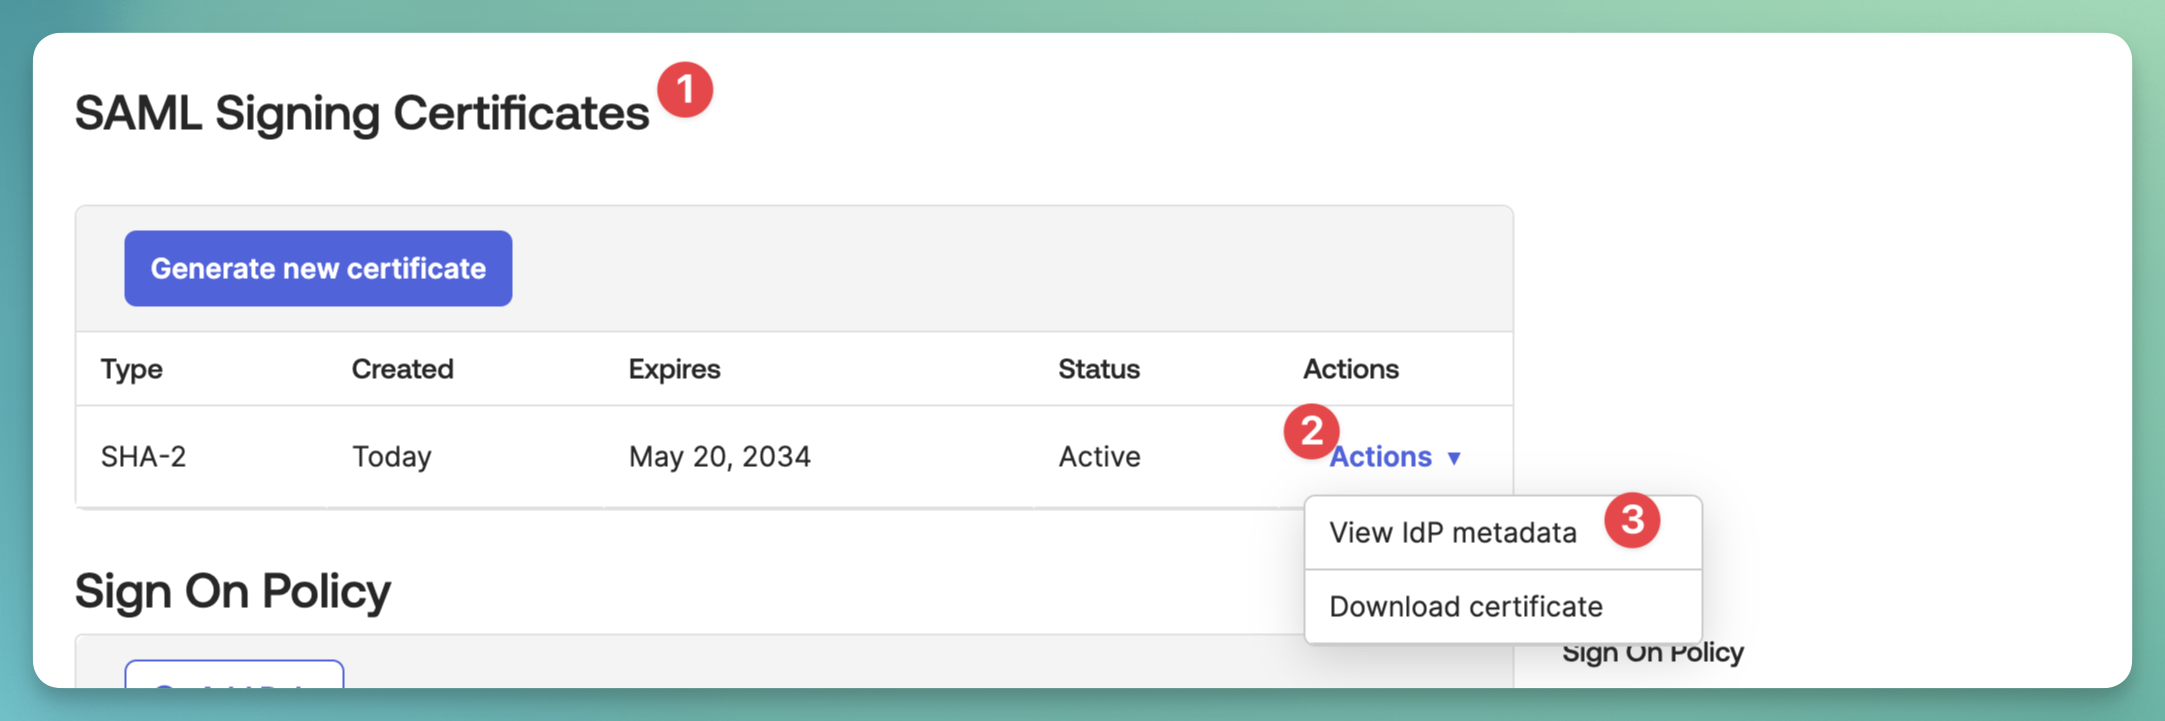
- Going to your WonderProxy account, navigate to Settings » Single Sign-On. Upload the metadata file downloaded in the previous step. At this point you might want to configure other aspects of Single Sign-On as described in our documentation.
- You are now ready to test the login flow.
WonderProxy Initiated flow
The sign-in process is initiated from WonderProxy.
- From your browser, navigate to the WonderProxy sign-in page.
- Enter your username or email
- You will be redirected to Okta to authenticate
- After this step is completed, you will be signed in to WonderProxy panel
Troubleshooting
If your identity is not recognized by WonderProxy, this means that the user provisioning is disabled for this integration. You need to either enable it in the settings or manually configure your users in the WonderProxy panel.
Okta Initiated flow
The sign-in process is initiated from your Okta End-user Dashboard.
- From your browser, navigate your Okta End-user dashboard
- Locate the WonderProxy tile
- After pressing it, you should end up signed in to the WonderProxy account panel