TP-Link router
Configure your router to use WonderProxy’s VPN
TP-Link Router VPN Configuration
For this example we are using the TP-Link AX5400 model router. Please consult TP-Link's website to determine which models supports the "VPN Client" feature. Each TP-Link’s router setup process can vary subtly depending on its model and firmware version.
TP-Link Routers can connect to a single VPN at a time, and can assign an arbitrary number of clients to that VPN. Clients not assigned to the VPN use the network connection normally.
Prerequisites
- Your WonderProxy username and password
- IKEv1 pre-shared secret:
(you must be logged in as a proxy user to view the shared secret)
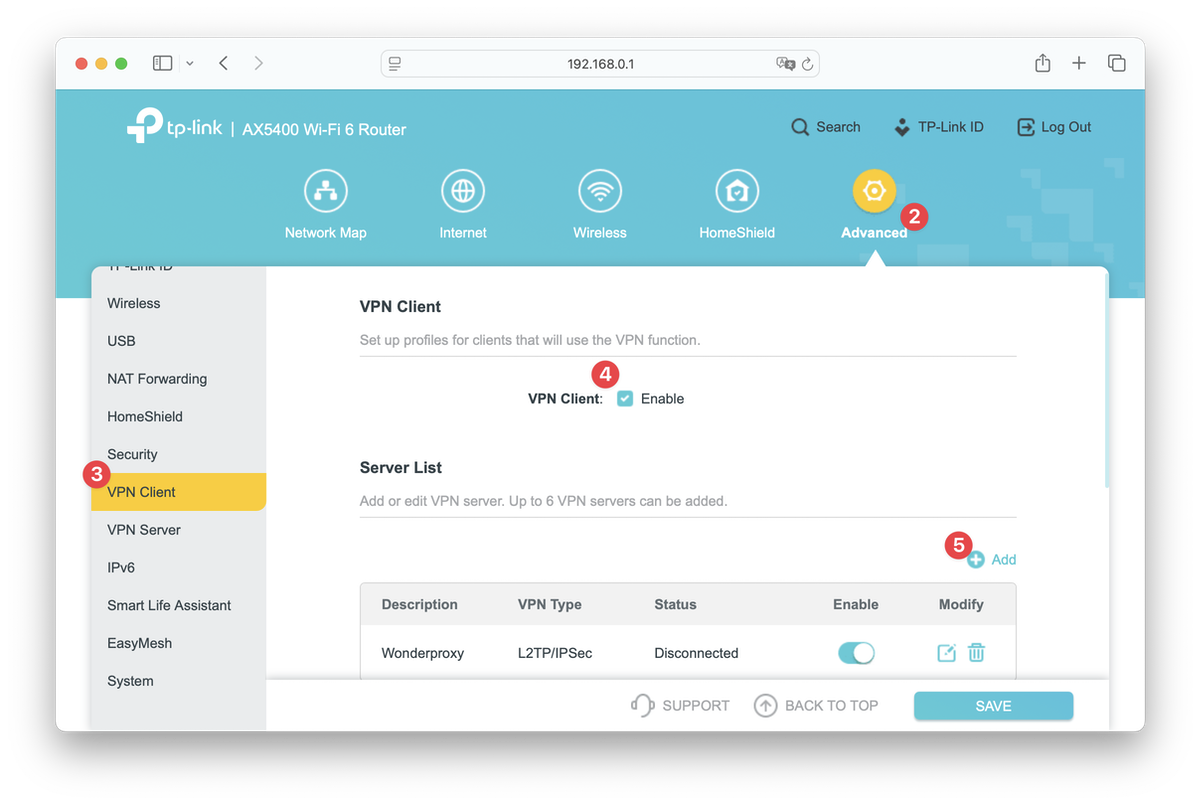
Configure VPN on a TP-Link Router
- Log into your router
- Select the Advanced tab
- Select VPN Client from the left sidebar
- You may need select Enable beside VPN Client
-
Under Server List click on Add
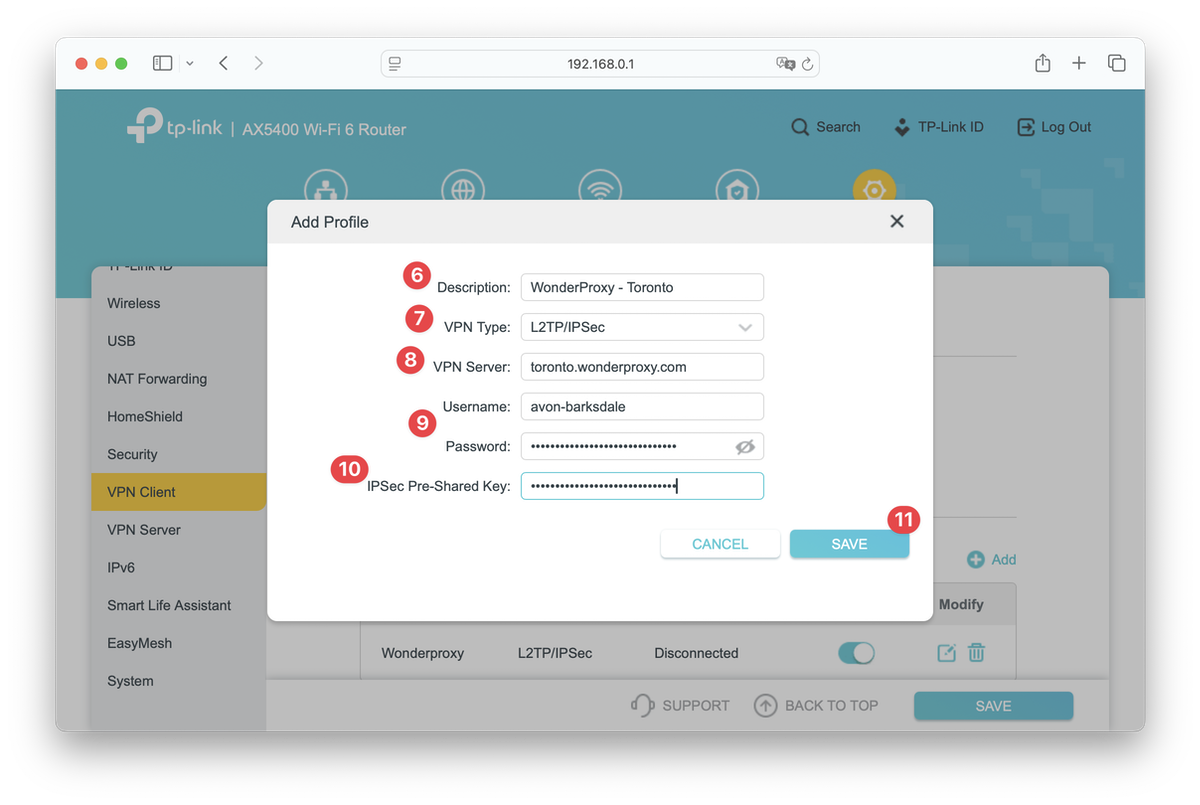
- Enter your server description, consider “WonderProxy - <location>”
- Select VPN Type L2TP/IPSEC
- Enter the proxy server using format <location>.wonderproxy.com
-
Enter your username, and WonderProxy Password
Many TP-Link routers are enforcing a 64 character maximum password length, so your proxy token can not be used - Enter the IPSec Pre-Shared Key:
(you must be logged in as a proxy user to view the shared secret) -
Click Save
- Select the toggle to enable the VPN
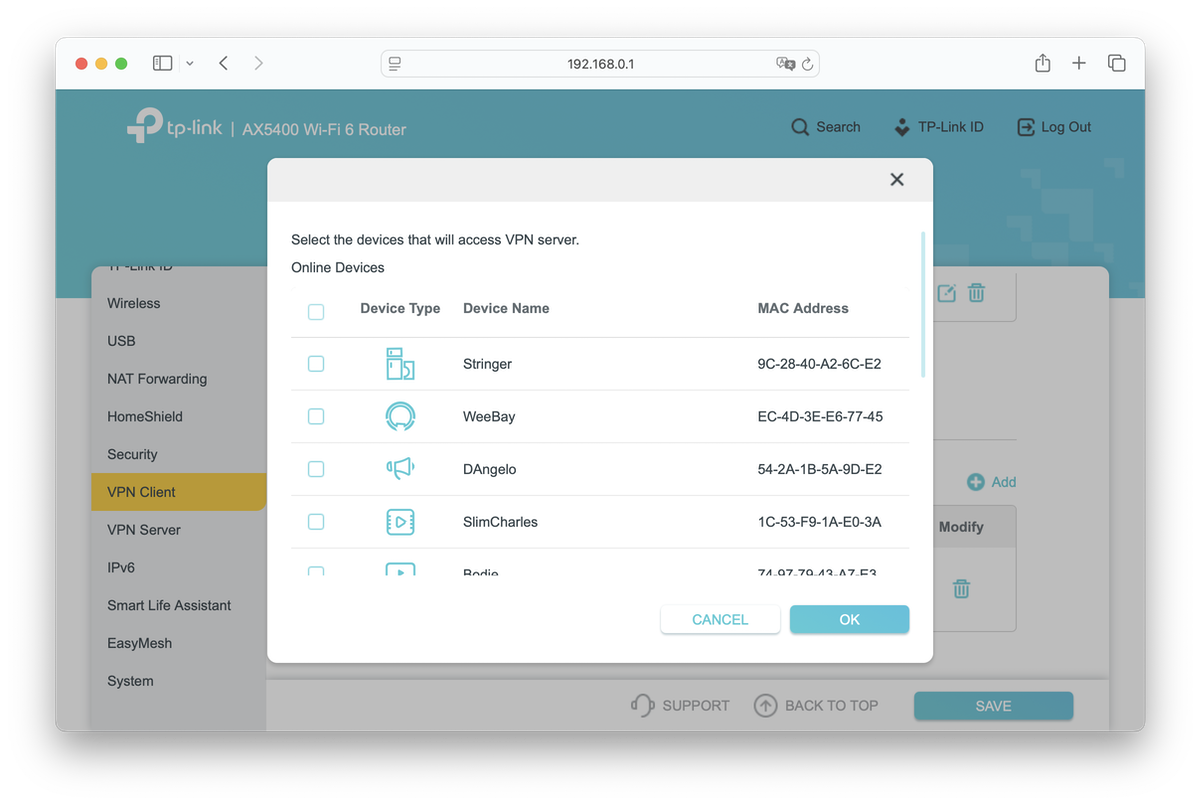
Add Devices to VPN List
TP-Link routers allow you to have some devices use the VPN while others do not. Add devices you wish to use the VPN to this list.
- Under Device List select Add
- Select the checkbox beside devices you wish to use the VPN connection
-
Select OK