macOS
Configure your system to use WonderProxy’s VPN
WonderSwitcher VPN App
The WonderSwitcher app is a convenient way to manage your VPN connections on macOS. It allows you to easily switch between different VPN locations and provides a user-friendly interface for managing your VPN settings.
-
Download the app from the Mac App Store:

- When you first open the app, you will be asked to log in to your WonderProxy account. This will make your WonderProxy VPN servers available to use (you will need to have already added some servers to your account in the WonderProxy dashboard).
- macOS will ask you for permission for the app to be able to set VPN configurations.
macOS VPN Manual Configuration
The following instructions were prepared based on macOS Sequoioa (15.x), but both previous and future versions should have a similar setup process.
IKEv2 using a passphrase
-
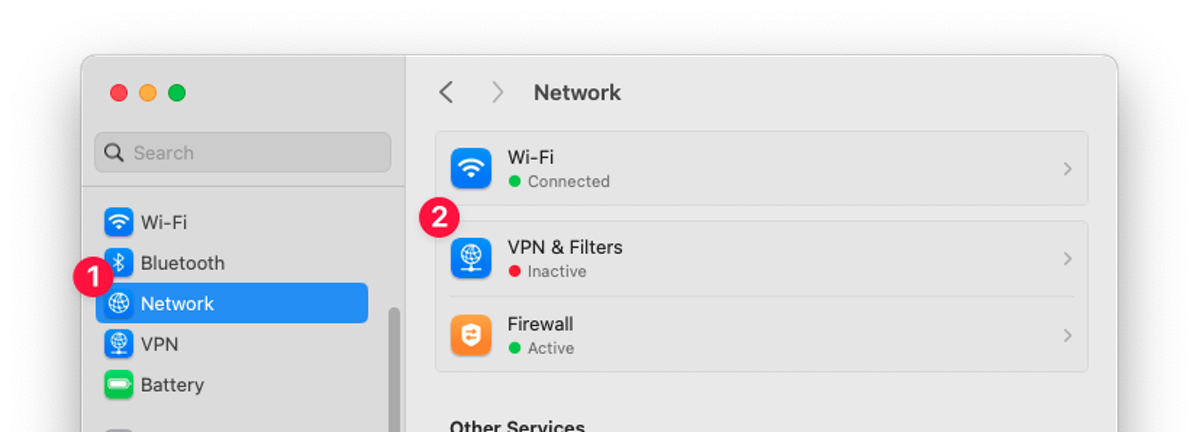
From the System Settings screen, select Network, and then VPN & Filters
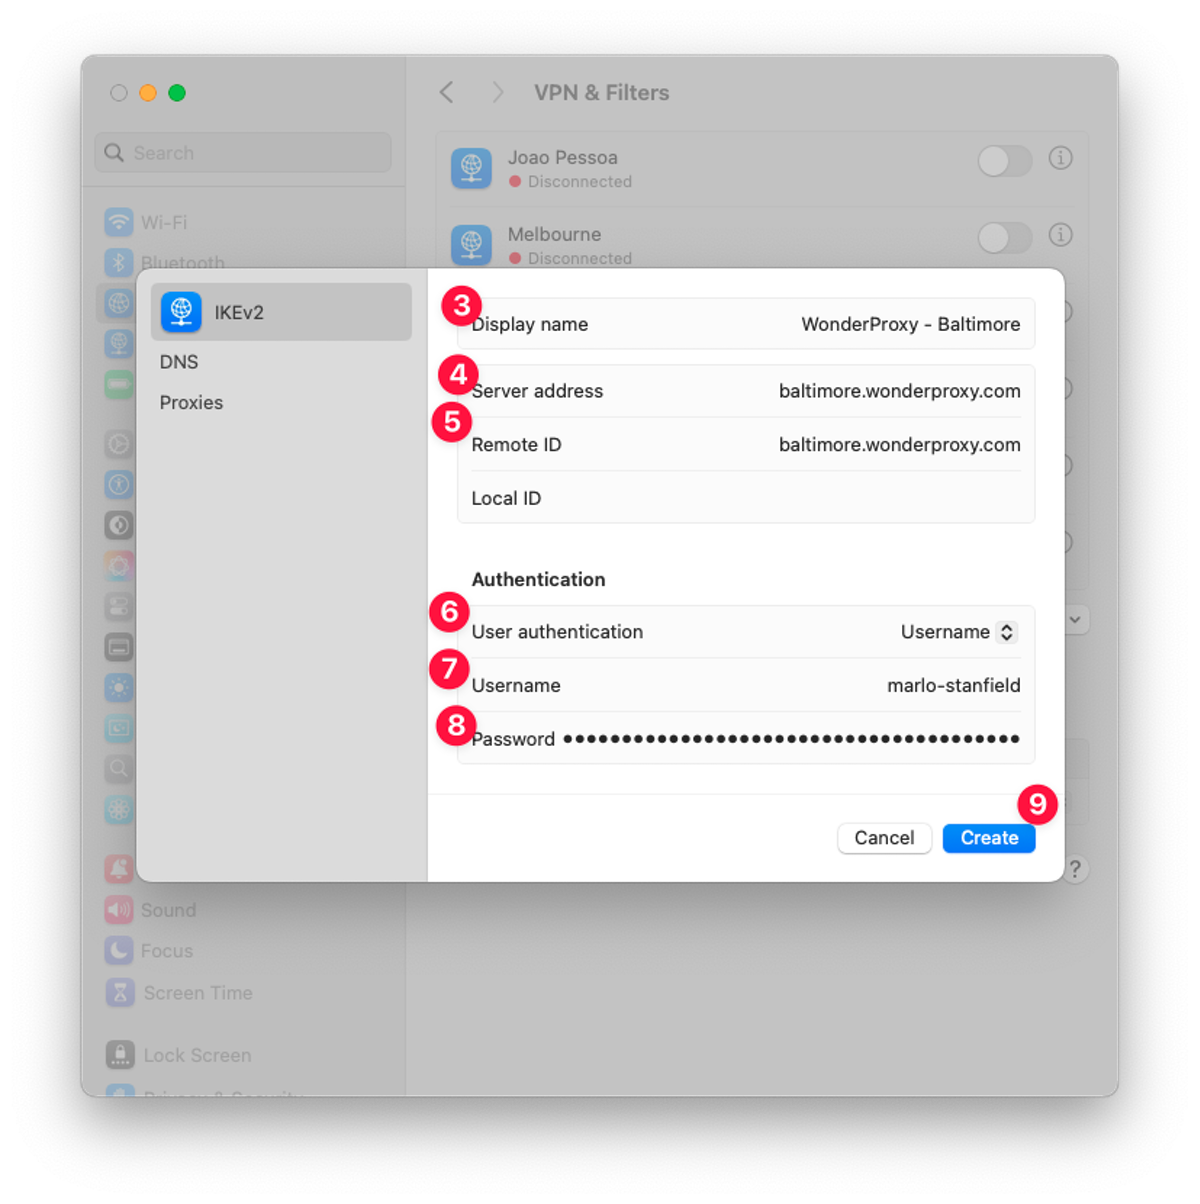
- Click Add VPN Configuration and select IKEv2…
- Enter the Display Name, consider “WonderProxy - <location>”
- Enter the Server address in the form <location>.wonderproxy.com
- Repeat the same value for Remote ID
- Select Username for the user authentication method
- Provide your WonderProxy username
- And a generated passphrase
-
Finally press Create to finish the setup.
-
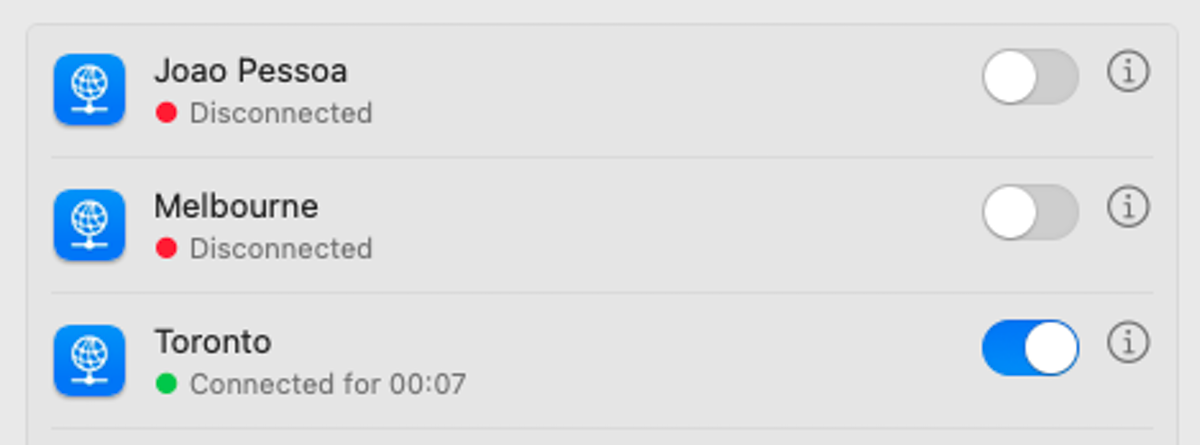
Now you can press the toggle next to your configuration to connect
IKEv1/IPSec using a proxy token
- From the System Settings screen, select Network
- Click the ...v button in the bottom left, select Add VPN Configuration and choose L2TP over IPSec...
- In Server Address, enter the hostname of the desired server (e.g. sanantonio.wonderproxy.com)
- Enter your WonderProxy user name for the Account Name
-
Enter your WonderProxy proxy token in the Password field
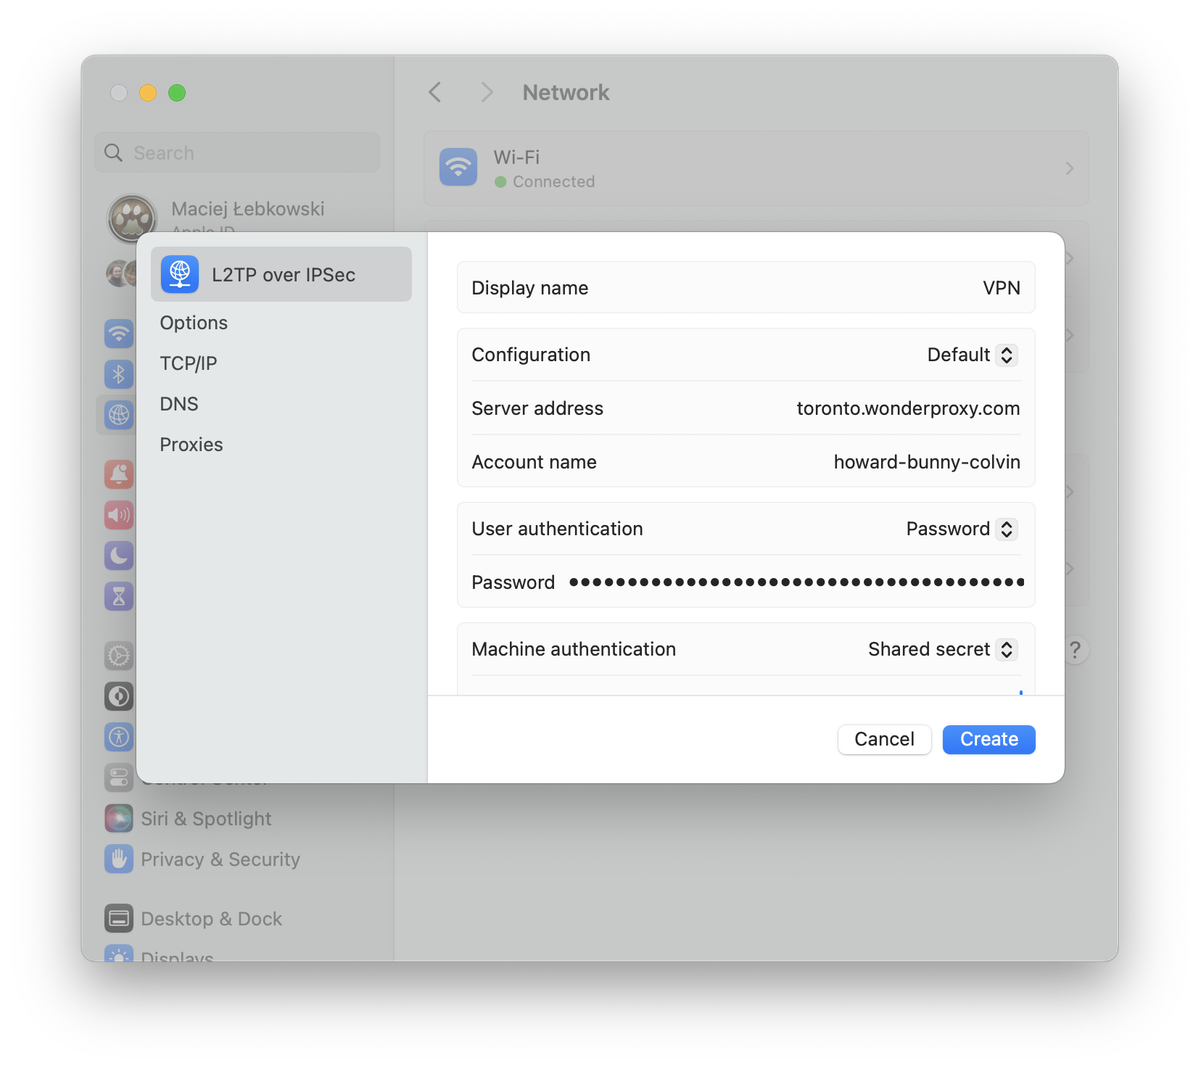
- Under Machine Authentication, select Shared Secret and enter: (you must be logged in as a proxy user to view the shared secret)
- Move to the Options tab.
- Check the box for Send all traffic over VPN connection
- Click Create. Your new VPN connection should be listed in the VPN & Filters section.
-
Toggle the button next to your configuration to connect