Browser Extension
Use our WonderSwitcher browser extension to quickly switch between proxy servers
WonderSwitcher
The WonderSwitcher browser extension is designed to allow you to start testing sooner, and complete your manual testing faster.
Installation


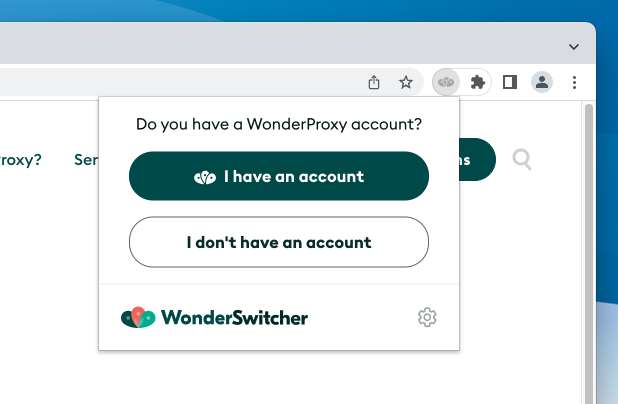
Getting started
After installing the Switcher, follow the steps in the pop-up to import your WonderProxy servers or add custom servers.
Search or browse to find a proxy server, and click to connect. When you are connected to a proxy server, the Switcher icon will turn green.
Access your settings and more features by clicking the gear icon in the pop-up.
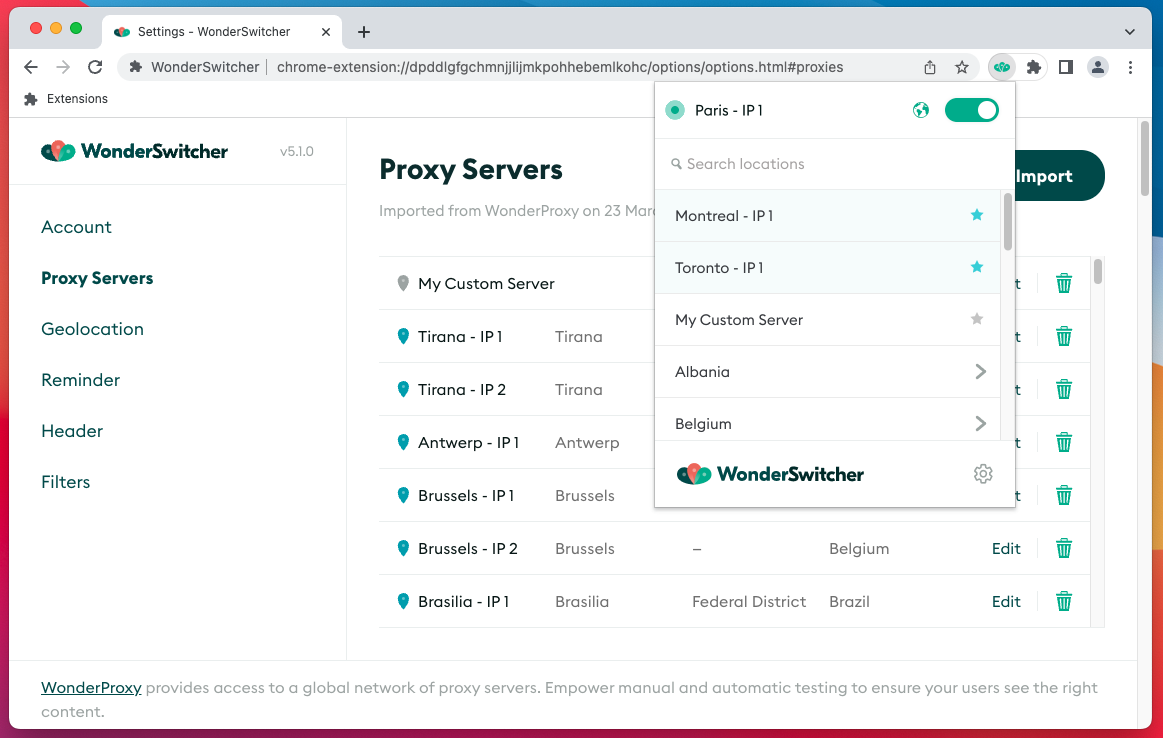
Proxy servers
Manage your proxy servers in the Proxy Servers tab in your settings.
Import WonderProxy servers
Import all servers from your WonderProxy account with the click of a button.
- Go to your account's Switcher page
- Click Import to Switcher
When you add or remove servers in your WonderProxy account, import them to the Switcher again to keep your list updated.

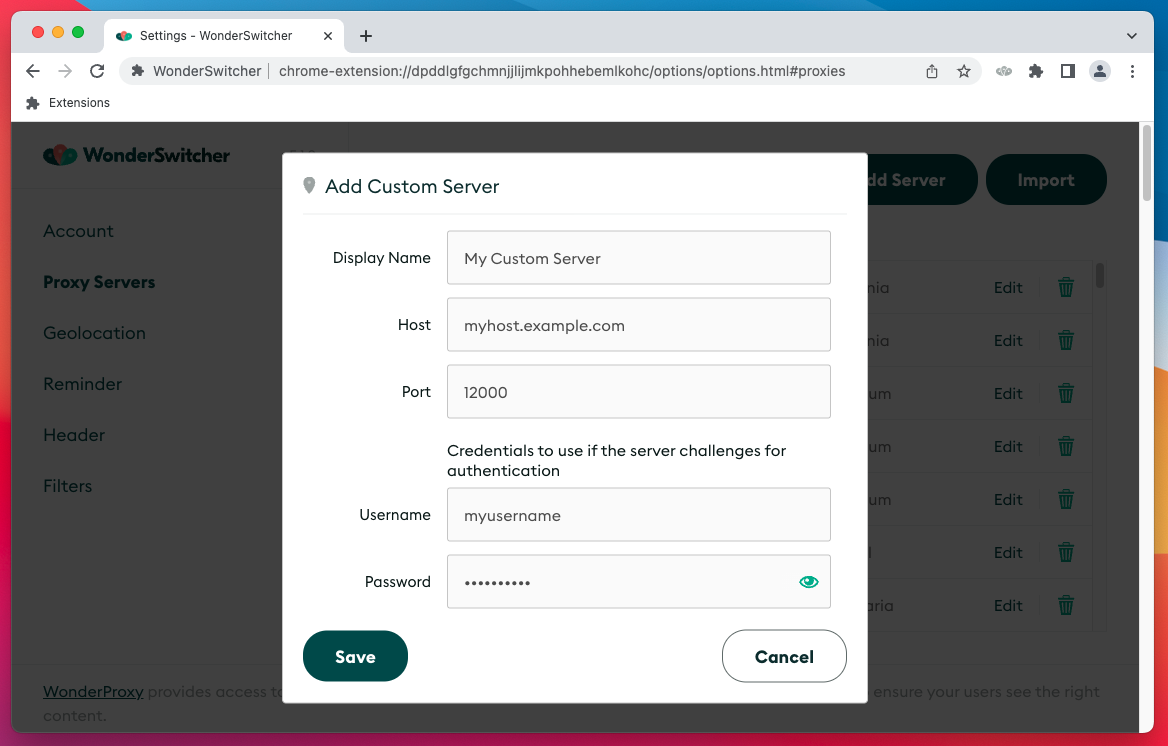
Add custom servers
If you have your own proxy server you'd like to use, you can add a custom server.
- In the Proxy Servers tab, click Add Server
- Set a display name, e.g. Custom Server
- Set a hostname, e.g.
example.com - Set a port, e.g.
12000 - Set a username and password (optional)
- Set to use either Unencrypted or Encrypted proxy scheme
- Click Save
Authentication
When you import from your WonderProxy account, you update the Switcher with your current server list, your username, and a new proxy token. The Switcher will use your username and proxy token for WonderProxy server authentication.
If you choose to add a custom server manually, you can enter the username and password required by that server when you add it.
Geolocation
The Switcher supports two types of localization testing:
| Type | Description |
|---|---|
| GeoIP | Send your browser traffic through a proxy server, so it reflects the proxy server's IP address and location |
| Browser geolocation (optional) | Override how your browser reports your location to match the coordinates of the proxy server |
All WonderProxy servers are physically located where we say they are. When you connect to a WonderProxy server, your geoIP and browser geolocation will reflect your selected location.
Both of these features:
- Work only while you are connected to a proxy
- Respect any filters you have enabled
GeoIP testing
When you connect to a WonderProxy server, your browser traffic will travel through that proxy server and adopt its IP address. Any websites that are localized with geoIP will place you at the location of the proxy server.
This feature works automatically whenever you connect to a WonderProxy server.
Browser geolocation testing
Your browser can determine the physical location of your device using GPS, WiFi positioning, cell network positioning, and other methods. When you connect to a WonderProxy server, the Switcher can override your browser location to match the latitude and longitude of the proxy server.
Geolocation overriding is optional, but on by default. You can manage this feature in the Geolocation tab. This feature is not available for custom servers.
- Enable Override browser geolocation
-
Enable location sharing in your browser settings:
Share your location in Chrome
Share your location in Firefox
Share your location in Edge - Connect to a WonderProxy server
- Visit the site you want to test
- Allow the site permission to access your location, when prompted
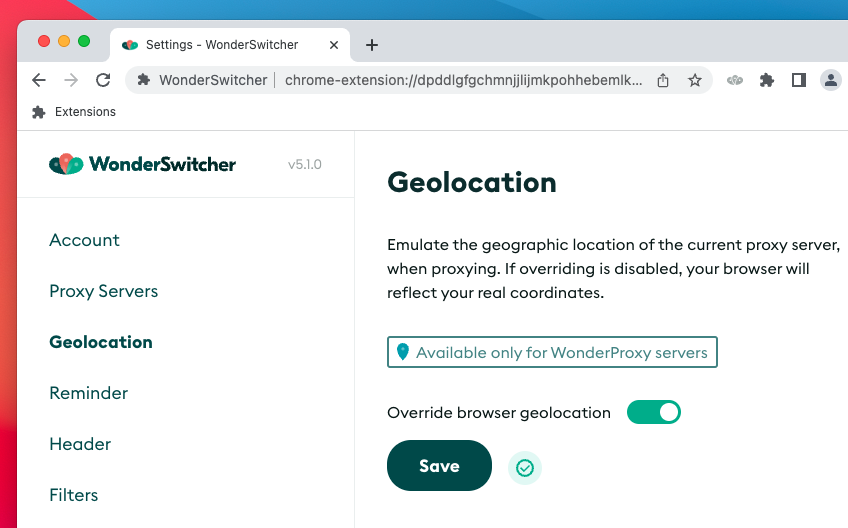
When geolocation overriding is enabled, a small globe icon will appear in the Switcher popup.
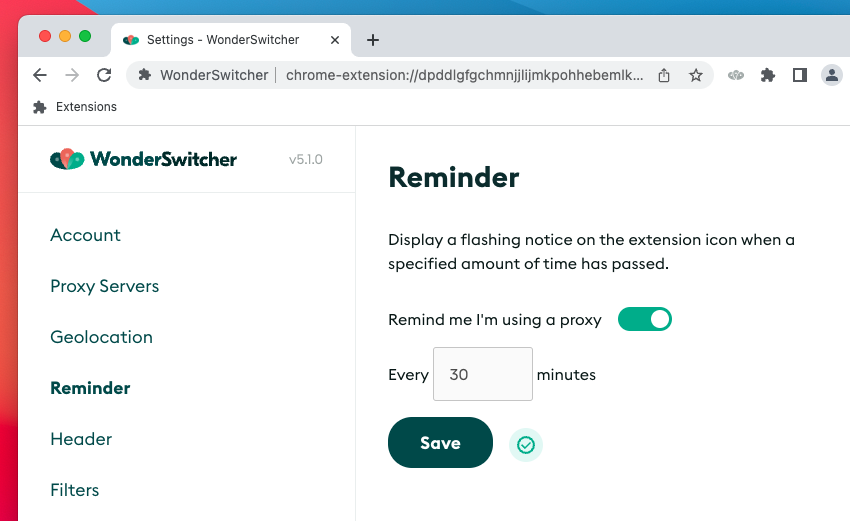
Reminder
Display a flashing notice on the extension icon when a specified amount of time has passed.
- Open WonderSwitcher extension and click Settings, then the Reminder option in the side menu
- Ensure that the reminder setting is enabled and you have entered an amount in minutes
- Save your changes
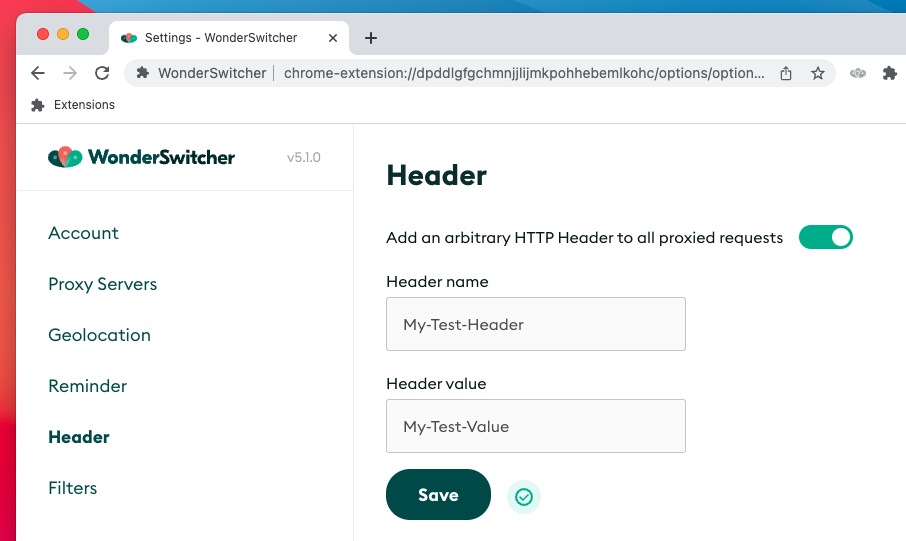
Header
Set a custom HTTP header that will be included when using the Switcher. It's occasionally useful to identify your testing traffic, either to bypass your CDN, or to have your testing traffic omitted from analytics.
- Open WonderSwitcher extension and click Settings, then Header from the side menu
- Ensure that the feature is toggled on, and you have added values to both required fields
- Make sure to save your changes
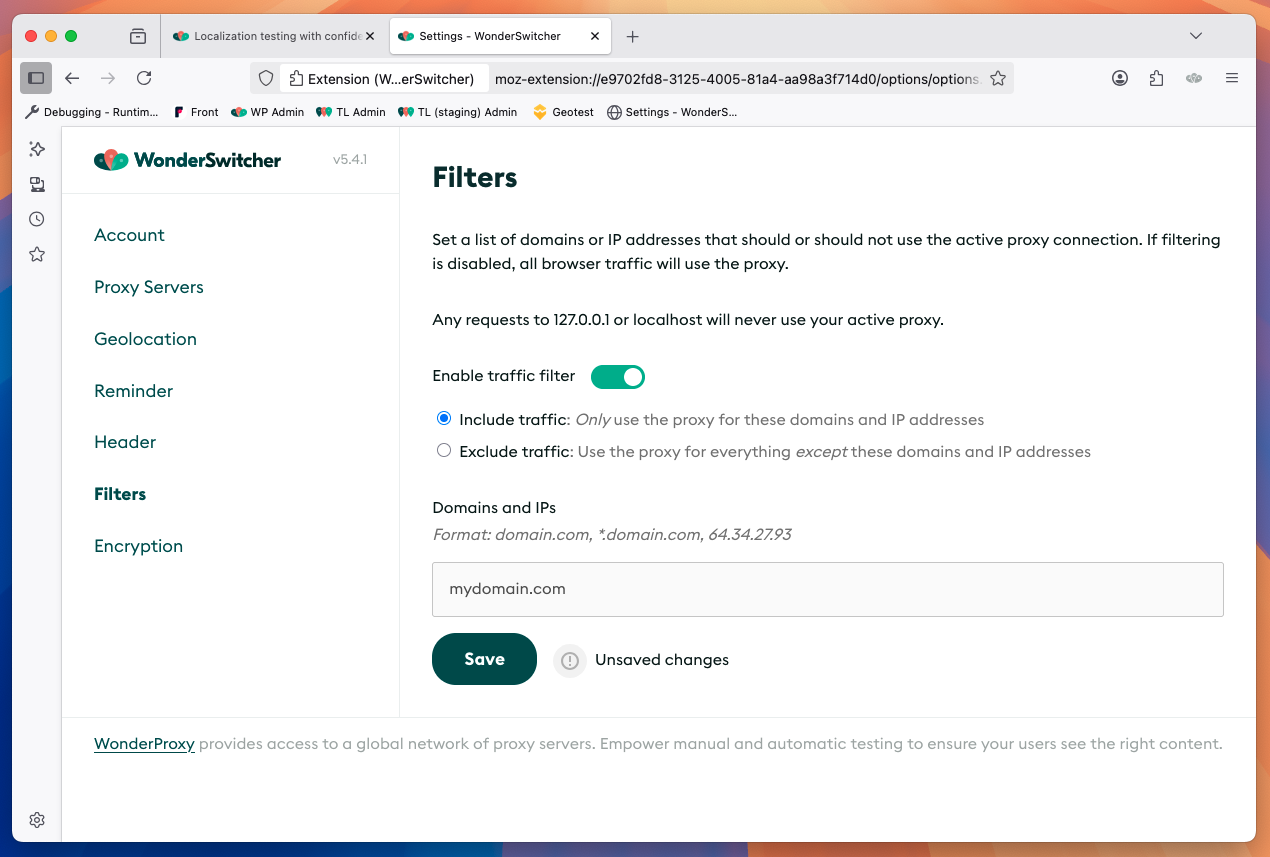
Filters
Specify domains or IP addresses you’d like to include or exclude from proxied traffic. Exclusion is useful when you wish to access internal network resources (like a bug tracker) while using the proxy. Inclusion is useful when you wish to only route some traffic through the proxy (like your website) while skipping the proxy for all other traffic.
- Open WonderSwitcher extension and click Settings, then click the Filters menu option.
- Toggle the feature on
- Select the Include traffic or Exclude traffic option
-
List the domains or IPs you would like to filter, separated by commas (
example.com,docs.example.org) All subdomains of listed domains are automatically included, soexample.comcoversmail.example.com,blog.example.comanddev.blog.example.com. - Save your changes

- Open WonderSwitcher extension and click Settings, then click the Filters menu option.
- Toggle the feature on
- Select the Include traffic or Exclude traffic option
-
List the domains or IPs you would like to filter, separated by commas (
example.com,docs.example.org). You can use the*wildcard to match all subdomains of a domain, so*.example.comcoversmail.example.com,blog.example.comanddev.blog.example.com. - Save your changes
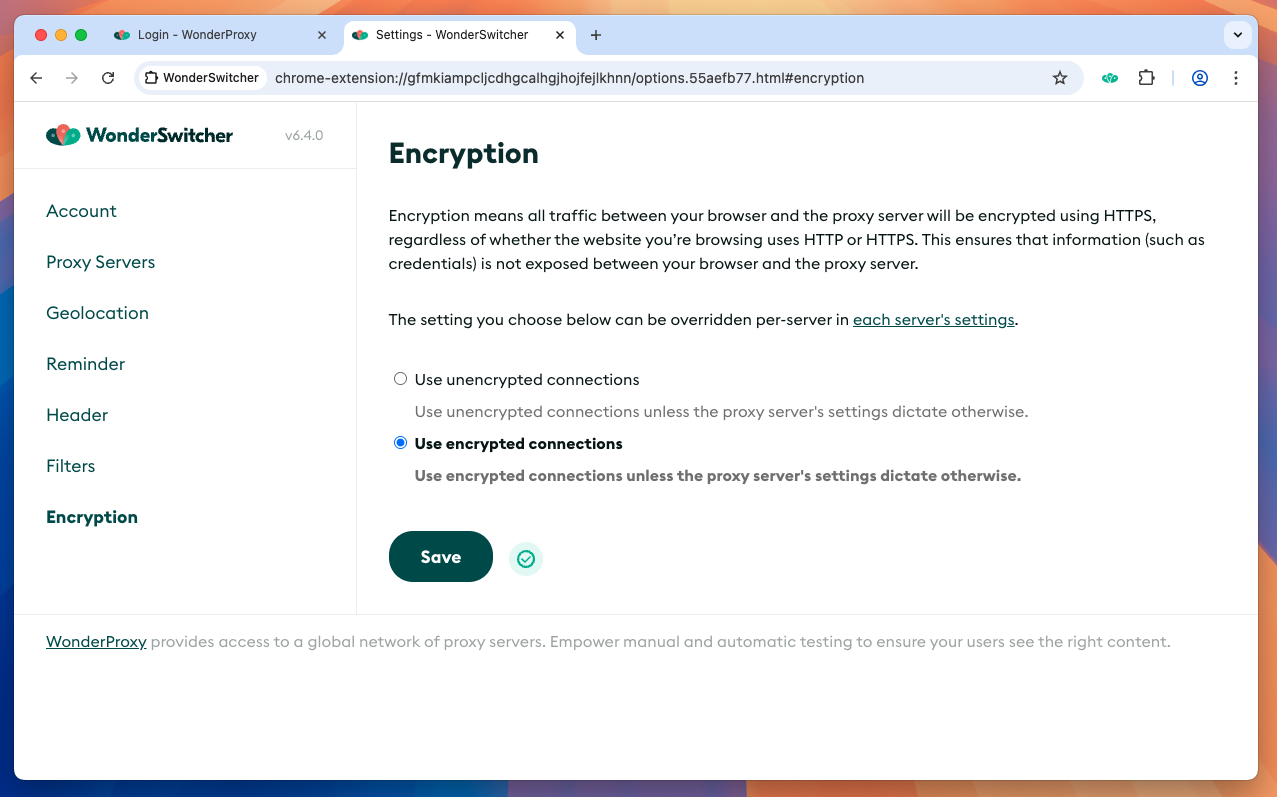
Encryption
Encryption means all traffic between your browser and the proxy server will be encrypted using HTTPS, regardless of whether the website you’re browsing uses http:// or https://. This ensures that information (such as credentials) does not get exposed between your browser and the proxy server.
When you import your account into Edge & Firefox Switcher, all servers that support it will use encryption by default. In Chrome, the default will be unencrypted even for servers that support it (soon, Encrypted will be the default for all browsers).
In Switcher’s encryption options, you can choose to change the default, or set your preference per-server in a server’s settings in the “Proxy Servers“ options.
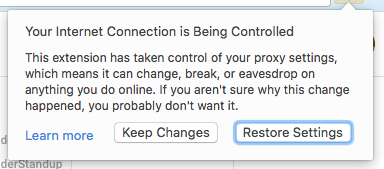
Warnings & notices
This popup may appear at some point after installing this plugin. It's warning you (correctly) that configuring a proxy server means all the data in your browser will be sent through that proxy. In our case, that's what we want: to use a proxy server for geoIP testing. You will need to select "Keep Changes" to continue using the WonderSwitcher.