Windows 7
Configure Internet Explorer, Chrome, Firefox, or Opera to use WonderProxy
Internet Explorer & Chrome
These settings are stored by Microsoft Windows. Other applications such as Microsoft Outlook may also follow them. Ensure these settings do not remain in place beyond your testing to avoid routing unnecessary traffic through the proxy network.
- From Internet Explorer's Tools menu (or gear icon), select Internet Options. Or, from Google Chrome's Options menu, select the Under the Hood tab, and click Change proxy settings. The Windows Internet Properties window will open.
- Select the Connections tab
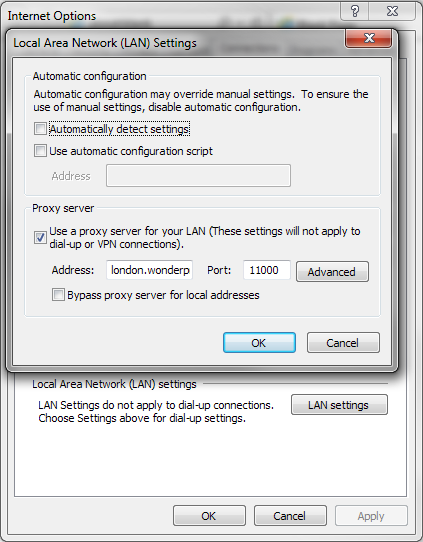
- Click the LAN settings button
- Select Use a proxy server for your LAN
- Enter the hostname for the desired HTTP proxy in the Address box (
london.wonderproxy.comfor example), and the appropriate port number (such as11000) - Click OK
- Click Apply
Firefox
- From the Tools menu, select Options
- Select the Network tab
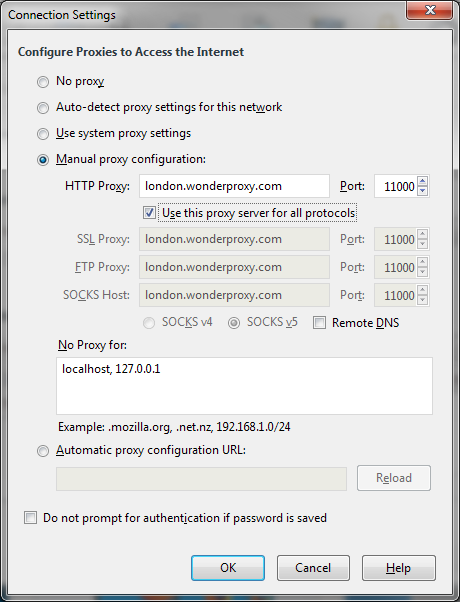
- Click the Settings button in the Connection frame
- Enter the hostname for the desired HTTP proxy (
london.wonderproxy.comfor example), and port11000. - Click OK
- Click Apply
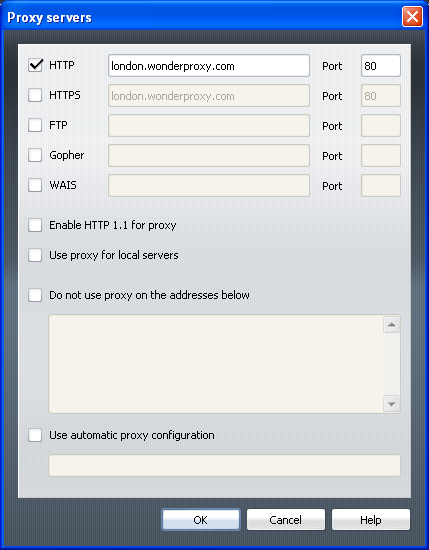
Opera
- Under the Tools option, select Preferences
- Select the Advanced tab
- Select the Network option
- Click the Proxy Servers… button
- Enter the hostname for the desired HTTP proxy (
london.wonderproxy.comfor example), port 11000. - Click OK
- Click OK