Testing authentication "unhappy paths" using a mock
Handling user authentication and making sure the many different scenarios work as planned can be a significant challenge for many development teams. Especially considering that the authentication layer is commonly handled through a separate service or even a third-party provider.
That means testers rarely have full control over the data or configuration needed to properly test all the other auth failures that real users might experience. Under these circumstances, having a mock API is a common solution. Through mocking, we are able to mimic the auth service with the freedom to adjust its behaviour as required. Authentication issues are massively frustrating for users and most likely to result in abandoning sites or apps.
In this article, I’ll explain how to use an open-source mocking tool named Mockoon to provide you with a simple way of mimicking different API responses to support your testing. Mockoon is my recommended tool for the job, as it requires no coding, it is quick to configure, with a short learning curve, and is absolutely free to use. Other tools are available.
If you would like to follow along with the steps to get your mock API running, make sure you download the Mockoon desktop application.
We will focus on ‘unhappy paths’. They are negative or error testing scenarios. Making sure it works on the happy path, doing what it is supposed to, is easy. Making sure we handle things well when it goes wrong, or down the unhappy path, is vital.
Scenarios to cover
In order to be able to start building the mock API, we first need to consider which scenarios we need to simulate. This involves understanding how the application is being configured and how the authentication service behaves.
The following authentication scenarios target some of the unhappy paths applicable to most applications. We’ll use some common API status codes to help describe our example scenarios.
| Scenario | Status Code | Description |
|---|---|---|
| Missing Token | 401 Unauthorized | When No Authorization header is provided Then the UI redirects to the login screen and displays an error message |
| Expired Token | 401 Unauthorized | When the access token has passed its expiry time Then the UI prompts the user to re-authenticate |
| Invalid Token Signature | 403 Forbidden | When the token has been tampered with Then the UI denies access to any restricted functionality |
| Insufficient permissions | 403 Forbidden | When the user is authenticated but lacks the required role, scope or permission Then the UI restricts access to any functionality out of scope |
| Disabled or locked account | 403 Forbidden | When the user account has been disabled, or locked Then the UI displays an appropriate error message |
| Authentication service unavailable | 503 Service Unavailable | When the authentication provider is offline Then the UI displays an appropriate error message, and the user is able to retry |
| Authentication service timeout | 504 Gateway Timeout | When the authentication provider does not respond within the expected time Then the UI displays a timeout error message |
| Rate limiting | 429 Too Many Requests | When the authentication endpoint rejects due to excessive traffic Then the the UI displays an appropriate error message |
The above scenarios represent a simple example that we can use to illustrate different use cases we could cover in our test scope. A common way of documenting an API is through its OpenAPI specification. To better demonstrate our mock creation, I’ll use this sample YAML representation.
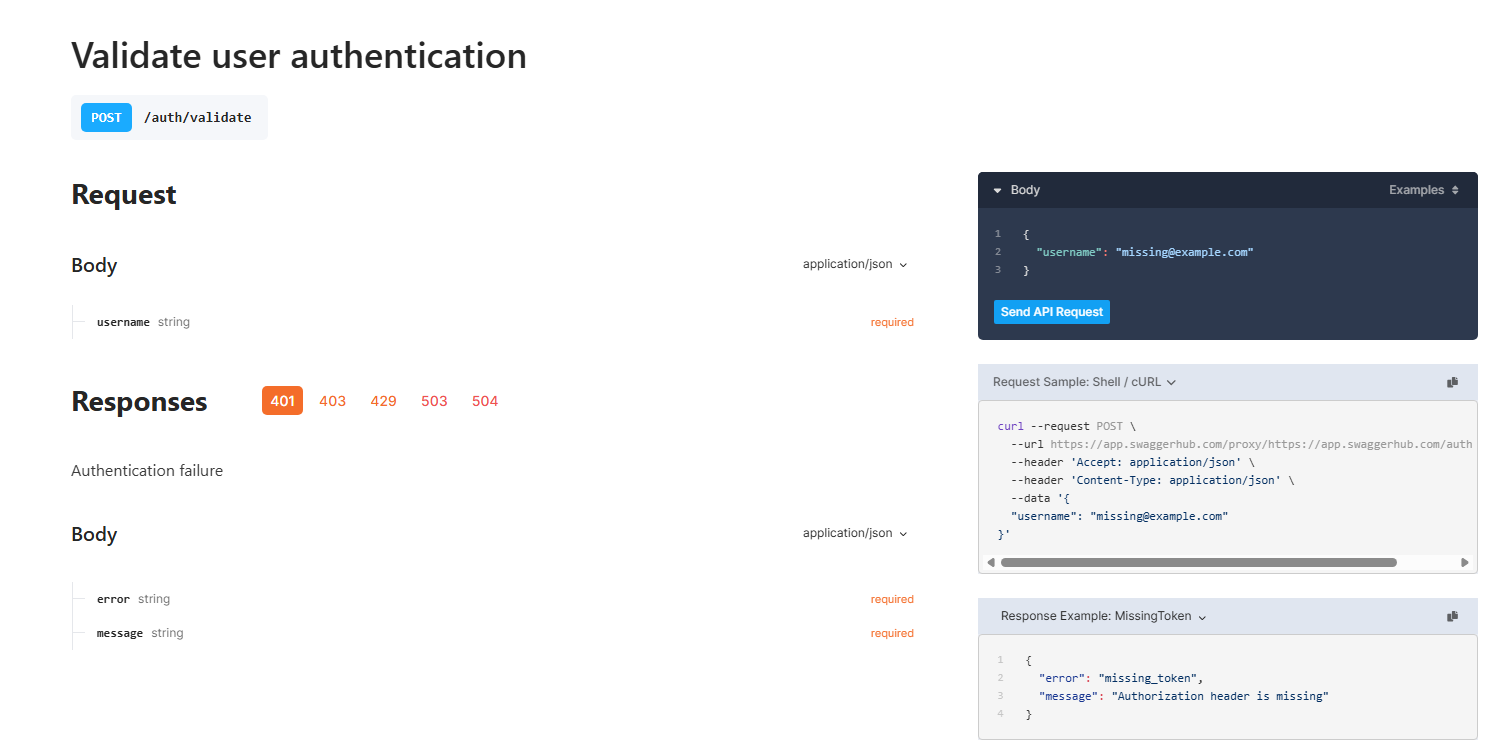
Note: If you want to follow along with the steps described in the next section, you can access the full content of the OpenAPI file through this WonderProxy blog post GitHub repository.
Setting up your mock API
Getting your initial mock up and running is very simple and only takes a couple of minutes using Mockoon, especially when you have the OpenAPI specification available.
Assuming that you have already downloaded Mockoon, I’ll walk you through the setup steps:
Step 1 - Create a new local environment
A local environment is an entity that represents a mocked API. The configured local environment will contain the endpoints, requests and responses, alongside other settings such as headers that might be needed for your mock API.
The first action you need to take is to create a new local environment from OpenAPI/Swagger. This option will allow you to provide the existing specification file.
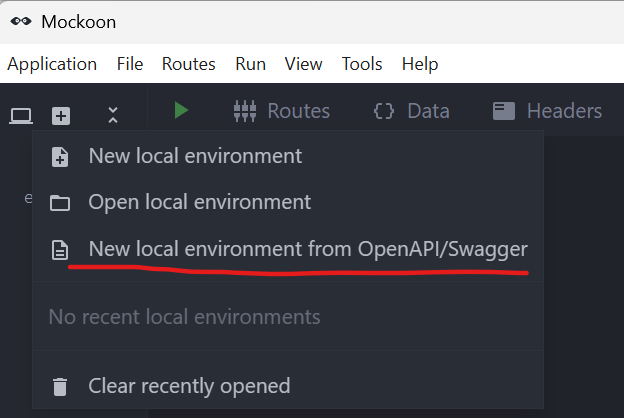
Note: If you don’t have an OpenAPI specification, you can create a blank new environment and add all your endpoints manually.
Step 2 - Import OpenAPI
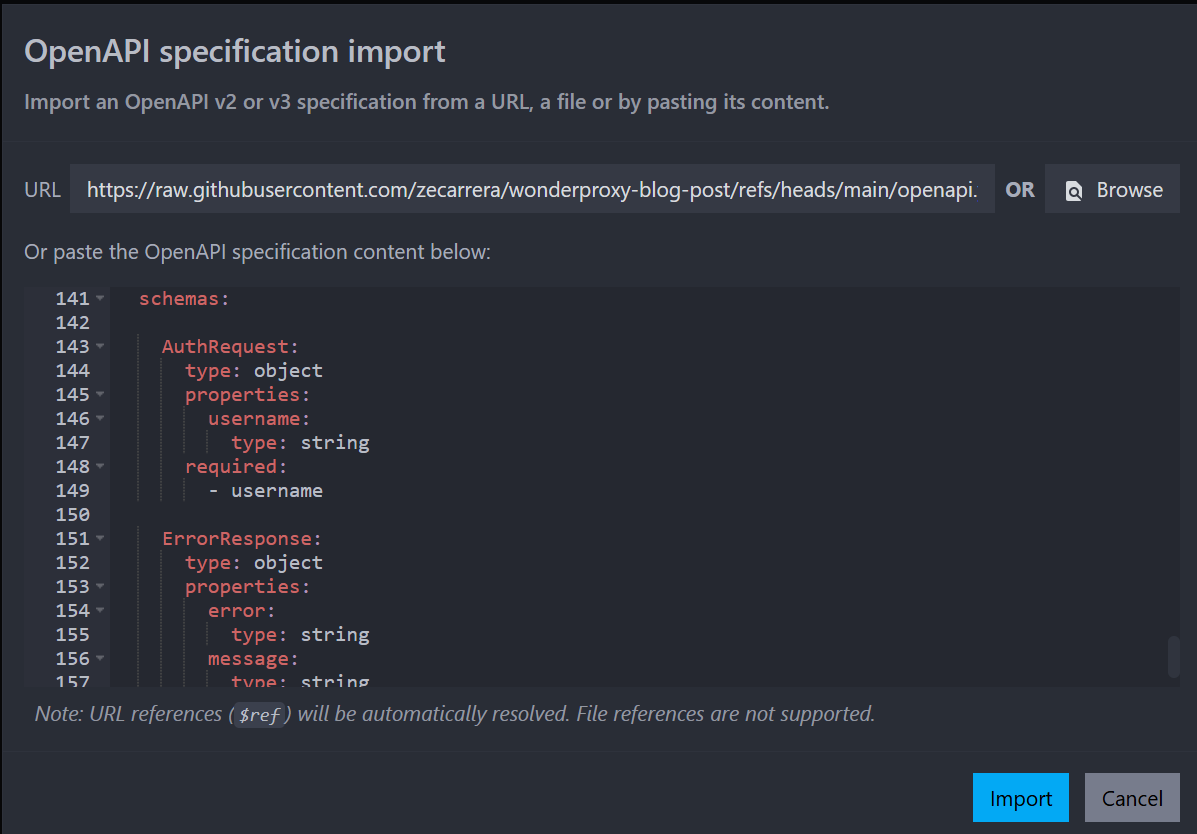
When importing the OpenAPI specification, we are providing Mockoon with all the information it needs to create the initial set that represents our API. It will read the file and create its endpoints, together with possible responses based on the examples provided in the specification.
In step two, you can either provide the URL to your specification or browse and select a file available on your local computer. Once a file is provided, its content will be loaded, and you can click the Import button.
Then you can verify that the OpenAPI examples have been properly created within your existing endpoints. For the specification we have provided, we have a single endpoint, auth/validate, which has been added alongside multiple responses based on our existing examples, like:
- 401 Authentication failure
- 403 Insufficient Permissions
- 429 Too Many Requests
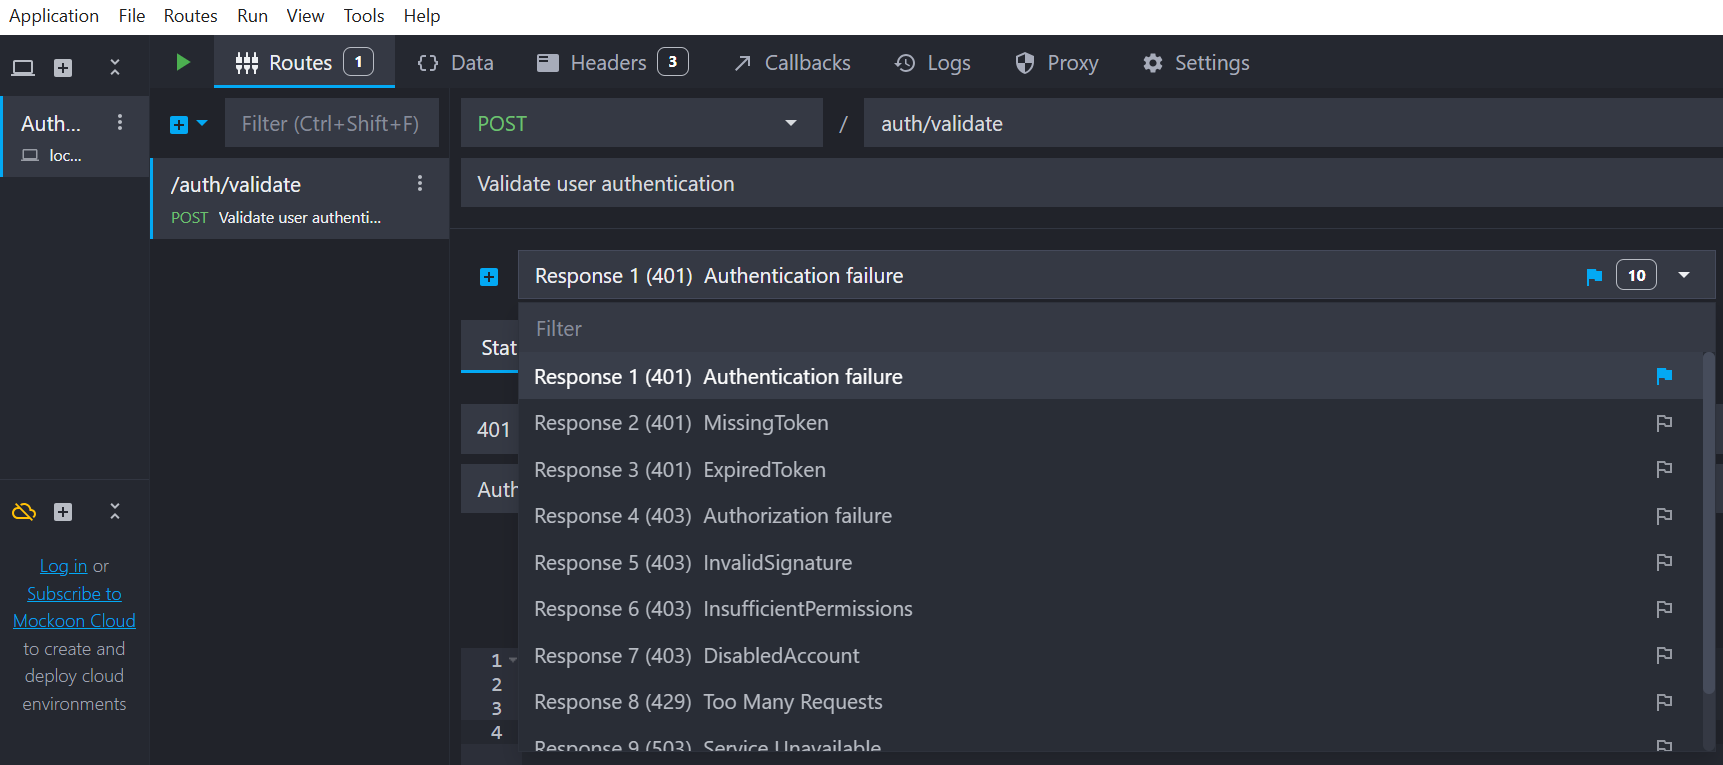
At this stage, you can also check the response body configured for each example response and make any necessary adjustments. Each response can have its custom response body, which facilitates testing each use case.
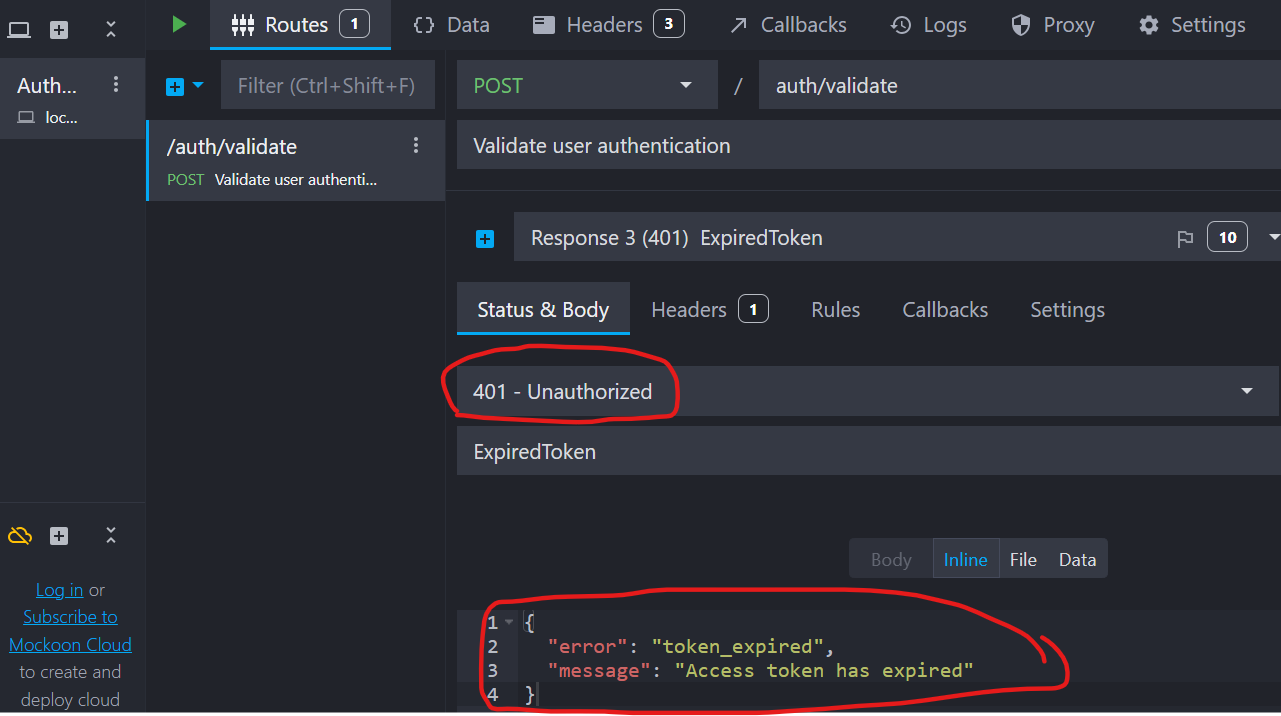
In the previous image, we can observe how our response can be configured to return a specific status code, in this example a 401 Unauthorized, and a customized response body.
Step 3 - Create rules for your endpoints
Finally, for situations where you have multiple responses for a given endpoint, you can create matching rules. For our example API, the /auth/validate endpoint takes a request payload body that contains the username parameter.
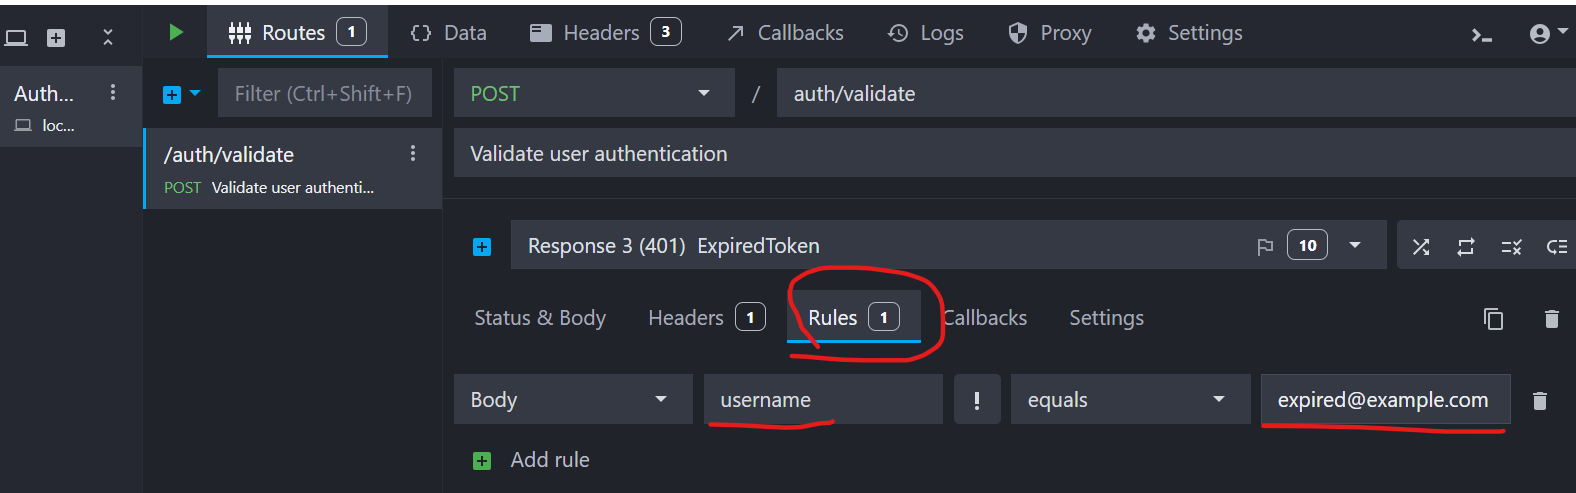
The specification we have provided utilises specific values for the username parameter as a way to easily allow us to trigger the different types of responses. In this scenario, we have expired@email.com, which is used to trigger the expired token scenario. The same approach would be applied to the other examples, like: missing@example.com to simulate the missing token scenario, or no-access@example.com to trigger the insufficient permissions use case.
Testing with your mock service
Once you have your mock API configured, you are ready to get your tests running. The mocked server will provide you with a mechanism to test your application in a controlled and predictable way and by combining this technique with further integration tests with the real authentication service you will build a reliable test strategy.
The mock server we have created can be started through Mockoon’s UI, and once it starts running it will be reachable on your local computer.
Let's describe the three required steps to run and validate your mock is working.
Step 1 - Run your mock API
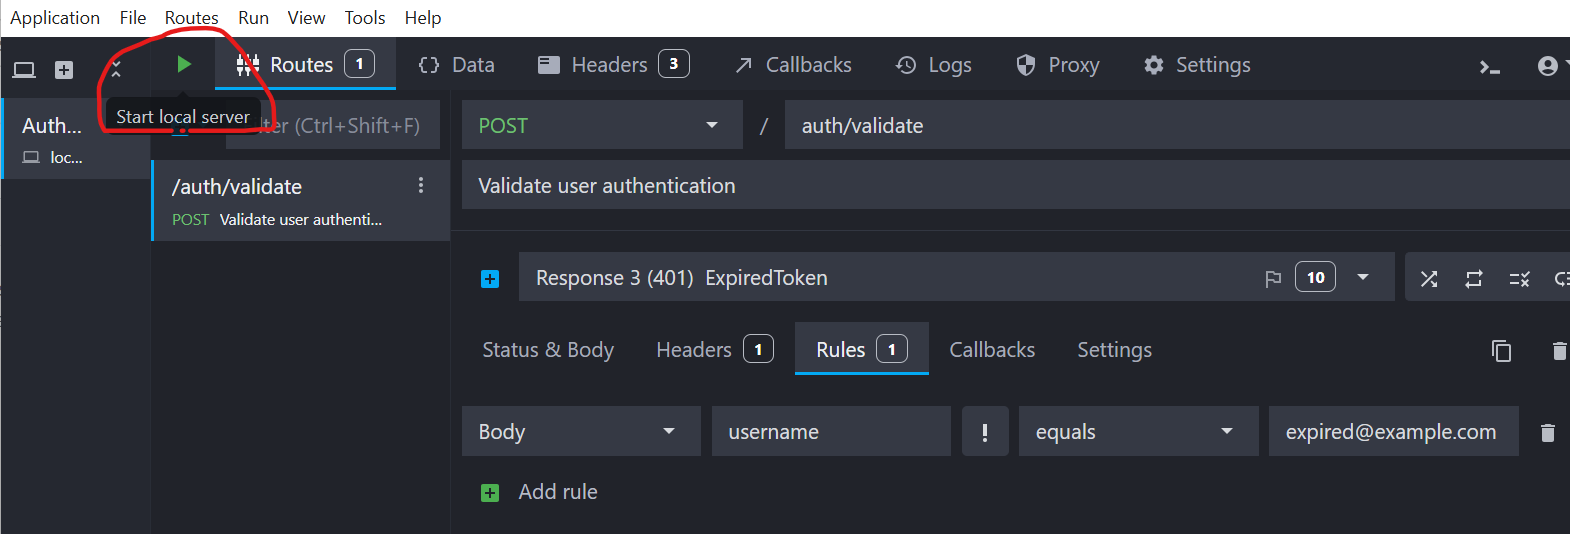
The Start local server option is available from the menu or the taskbar, and once you click the play button, the server will run.
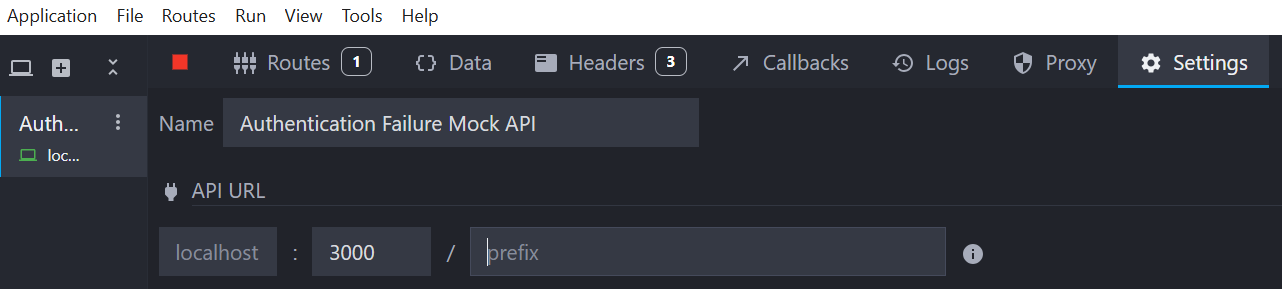
When an environment is created, Mockoon automatically assigns a port for the mock API. Its value can be seen within the settings tab. If needed, you can modify the initially assigned value and choose something that better suits your setup.
Step 2 - Trigger a test request
Once the mock API is running, you can attempt to trigger your configured endpoints. In the context of this article, I’ll illustrate this action through a PowerShell command that exercises our /auth/validate endpoint, but you can use any tool like Postman, Insomnia, etc. to perform the same task.
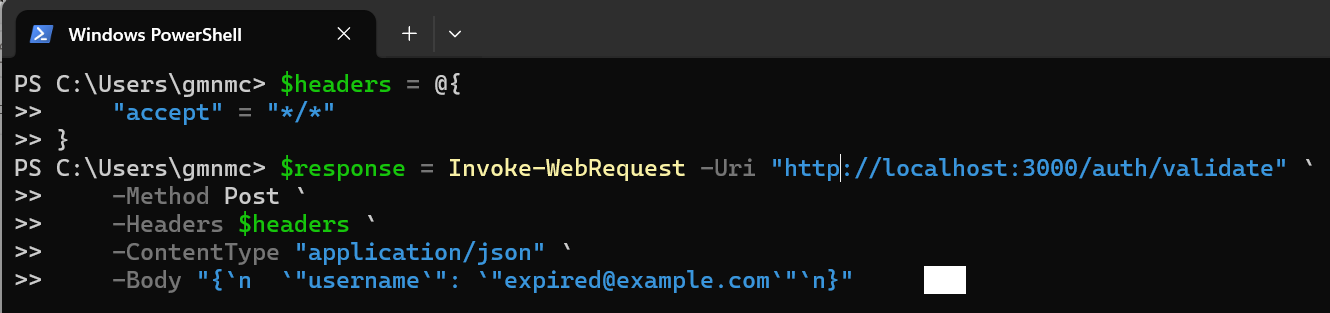
In the command shown, we have a POST call to the validate endpoint configured with a request body that sets the username parameter to expired@example.com.
Step 3 - Verify mock API logs
Our final step is to check that our requests are actually reaching our mock API. To do that, we can simply navigate to the logs tab. Displayed below is what we can visualise from the captured traffic. By default, it focuses on the request data, where we can observe the URL, request type, and request body that were sent.
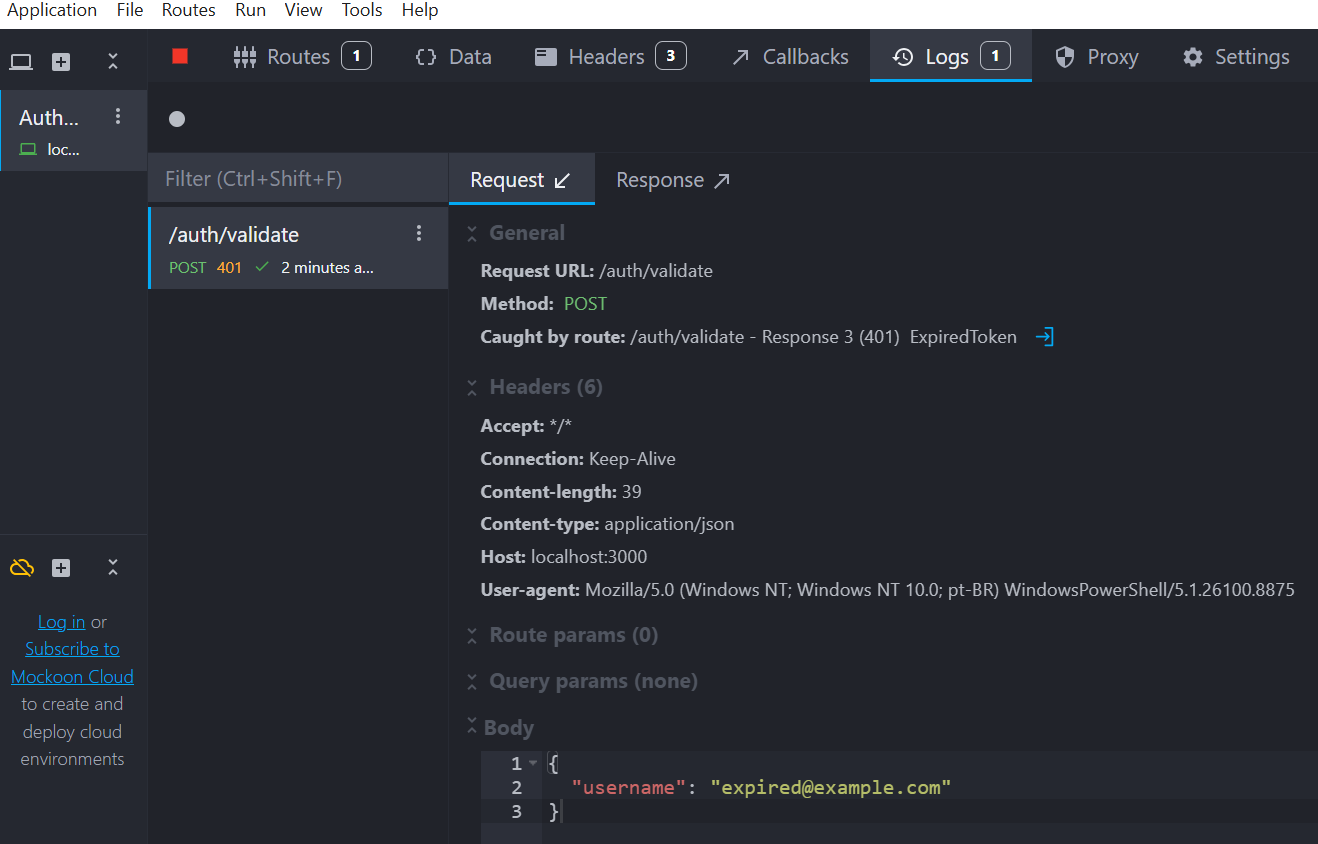
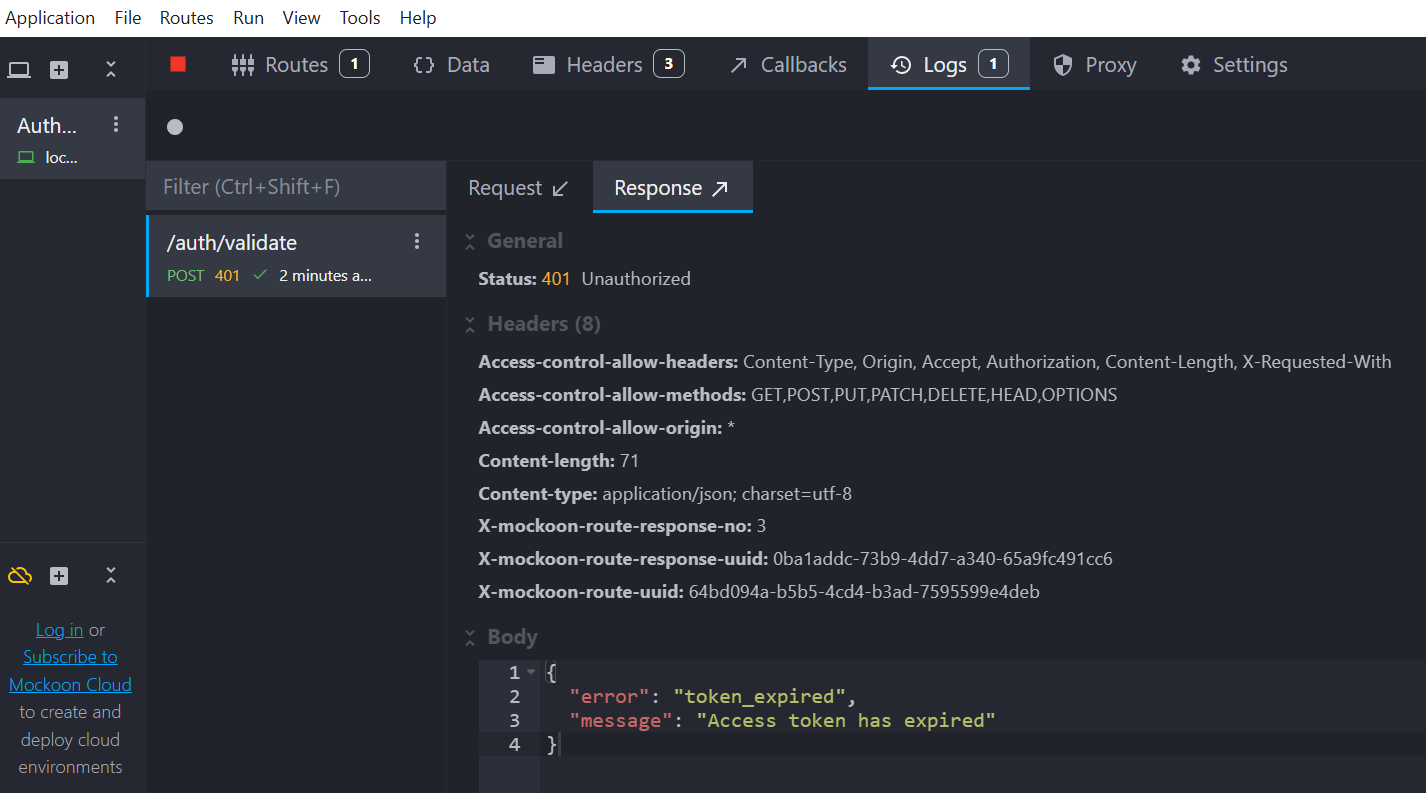
When clicking the Response tab the app gives us a view of the response data, where we can confirm that when a request with expire@example.com was received, our mock then replied with the custom 401 response with its body set to the expired token scenario.
Final thoughts
As we have just seen, testing unhappy authentication paths does not need to be a complex and unachievable task. There are several tools available that will allow you to mock a specific request or an entire API, such as, Postman, WireMock, Beeceptor, etc.
When compared to mockoon they usually mean limited number of requests/endpoints in the free tier or a more complex setup that requires deeper code knowledge.
The reason I chose Mockoon is due to it being an open-source tool that offers an easy-to-learn, get-started approach that allows you to mock any API, without any restriction in its free version. It is a tool I’ve used in multiple projects and has always proved efficient and reliable.
It is also important to bear in mind that testing through mocks is an approach to be used together with proper integration tests with the real API. If you rely solely on mocks, you will surely end up with escaped bugs, as it is very common for any existing OpenAPI specification to not be fully up to date with its service implementation.
In this article, we have limited our example to how to get it running locally, but the tool can also be used in your continuous integration environments, where you can have Mockoon running through the terminal. There is also a quite comprehensive set of features that would allow introducing more complex behaviour, like dynamic responses.
Evaluate your test strategy, see where mocking can be beneficial, and remember that it is one tool in your toolset, but not the only one and it won’t replace the need for live authentication service testing.